Advanced FDM Case Study
Introduction
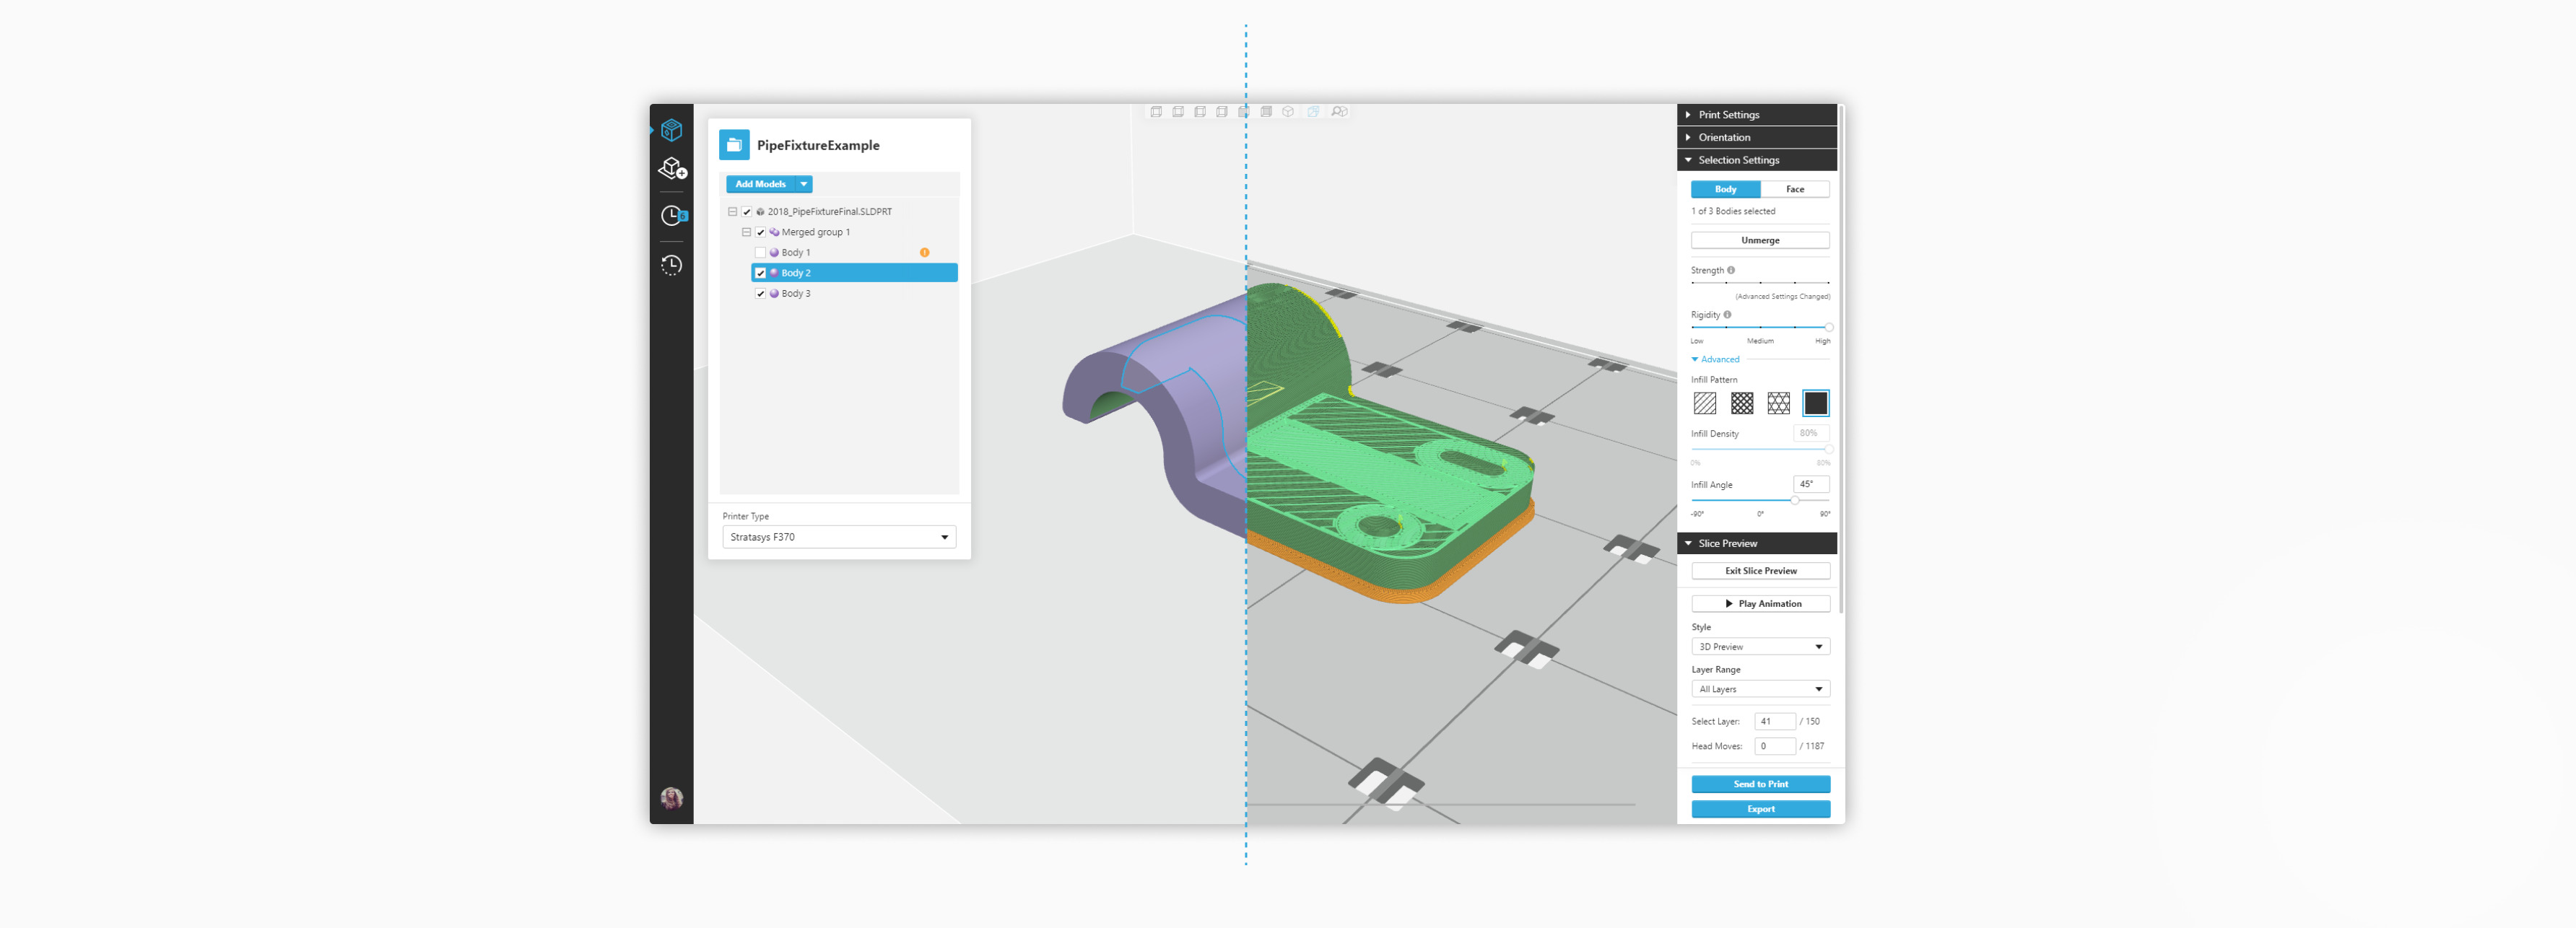
Advanced FDM is an advanced add-on for a 3d printing software GrabCAD Print. Advanced FDM allows users to prepare a part for advanced 3d printing, by assigning various properties to faces and bodies of 3D models.
My Role
I was the lead designer of this project. Along with the product manager on the team, I was tasked to understand the requirements for the software and come up with the ideal workflow for the users, conceptualize and design the required features, and work with developers on implementing the solutions over the last 1.5 years.
The Challenge
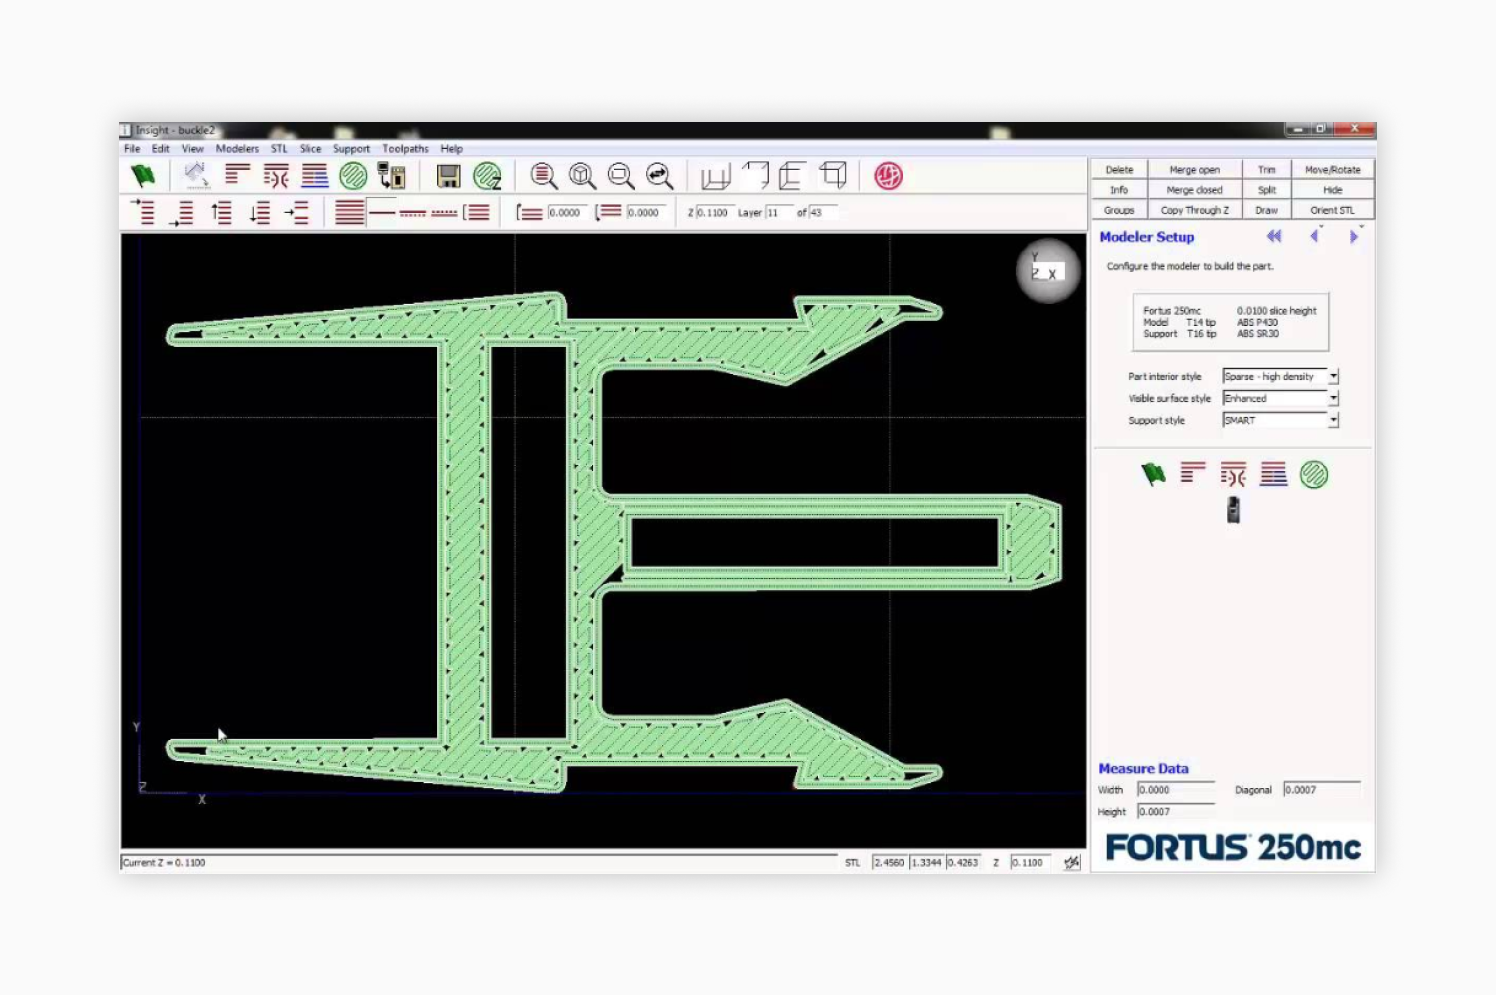
The existing software Insight that is used for advanced 3D printing is very powerful but is not intuitive and it requires a very steep learning curve. Our challenge was to design a software that carries on all the powerful features while being easy to use and speeds up the part preparation process.
The Process
Research: Understanding the user
Initially we interviewed and analyzed the workflows of users and discovered the main use cases for this application.
From this analysis, we made 4 user personas and defined their experiences in preparing their parts for 3d printing. The user personas were Designer, Application Engineer, AM Programmer and Printer operator.
We also realized that the purpose of this application had to enable the users to translate the designer's design intent from the 3D modeling language into 3d printing language.
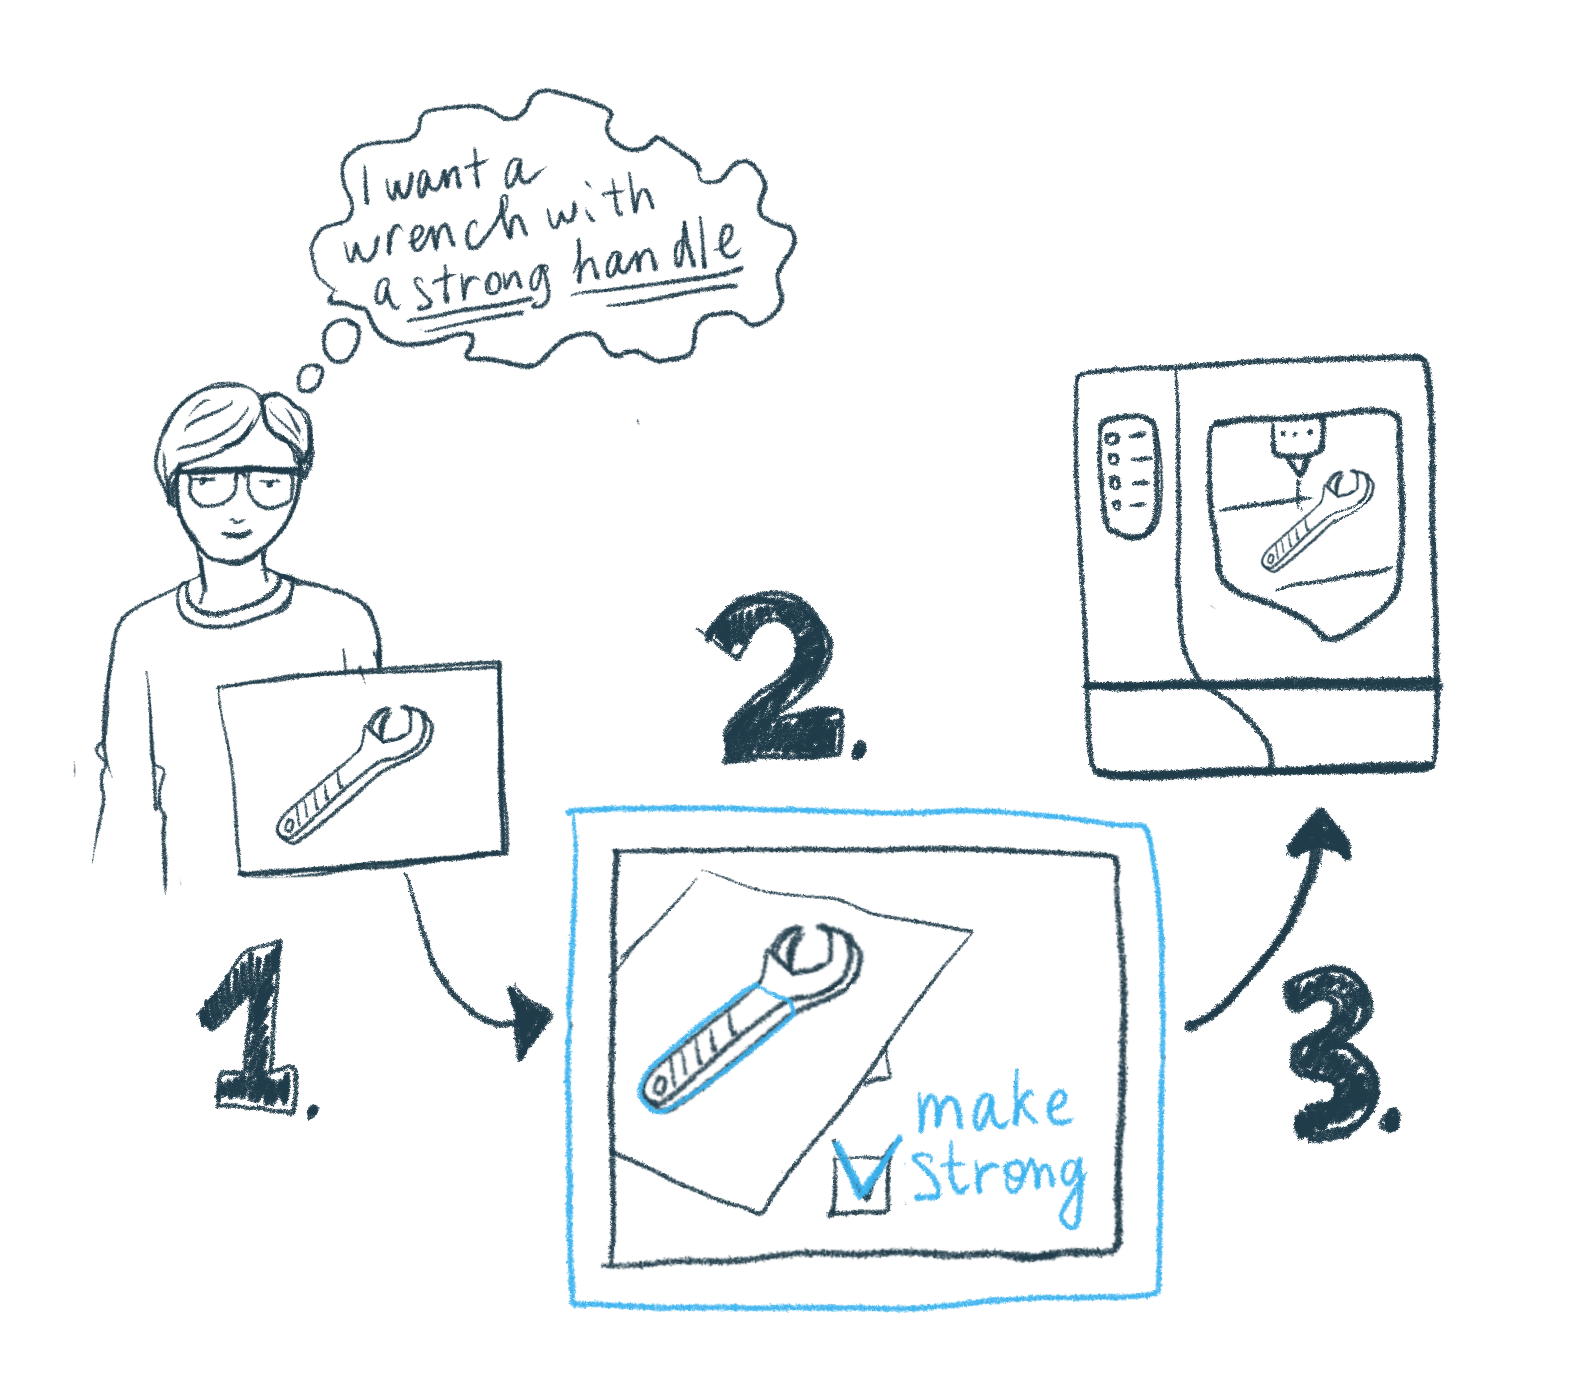
So the simplified ideal user journey goes like this:
1. A designer designs a wrench. As an example, he/she wants its handle to be strong once it's printed.
2. He/she uploads it to a 3d printing software and assigns the properties to the part that will respect the design intent, such as making a handle of this wrench strong.
3. He/she sends the part to a 3D printer and gets a printed part that has a strong handle.
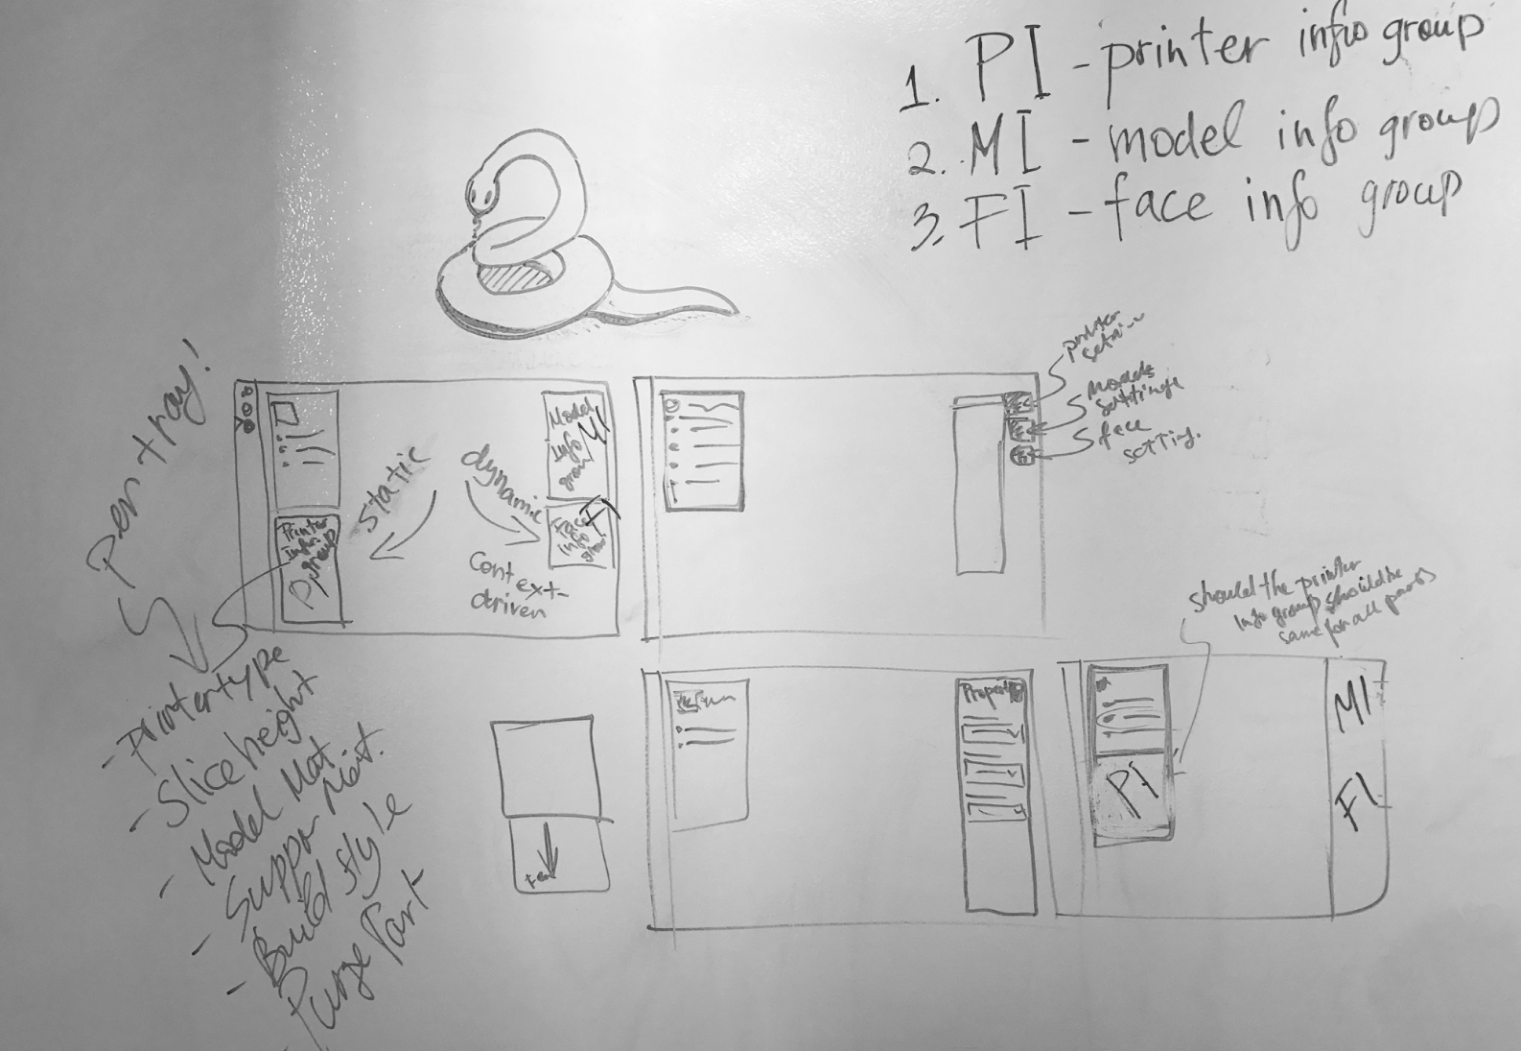
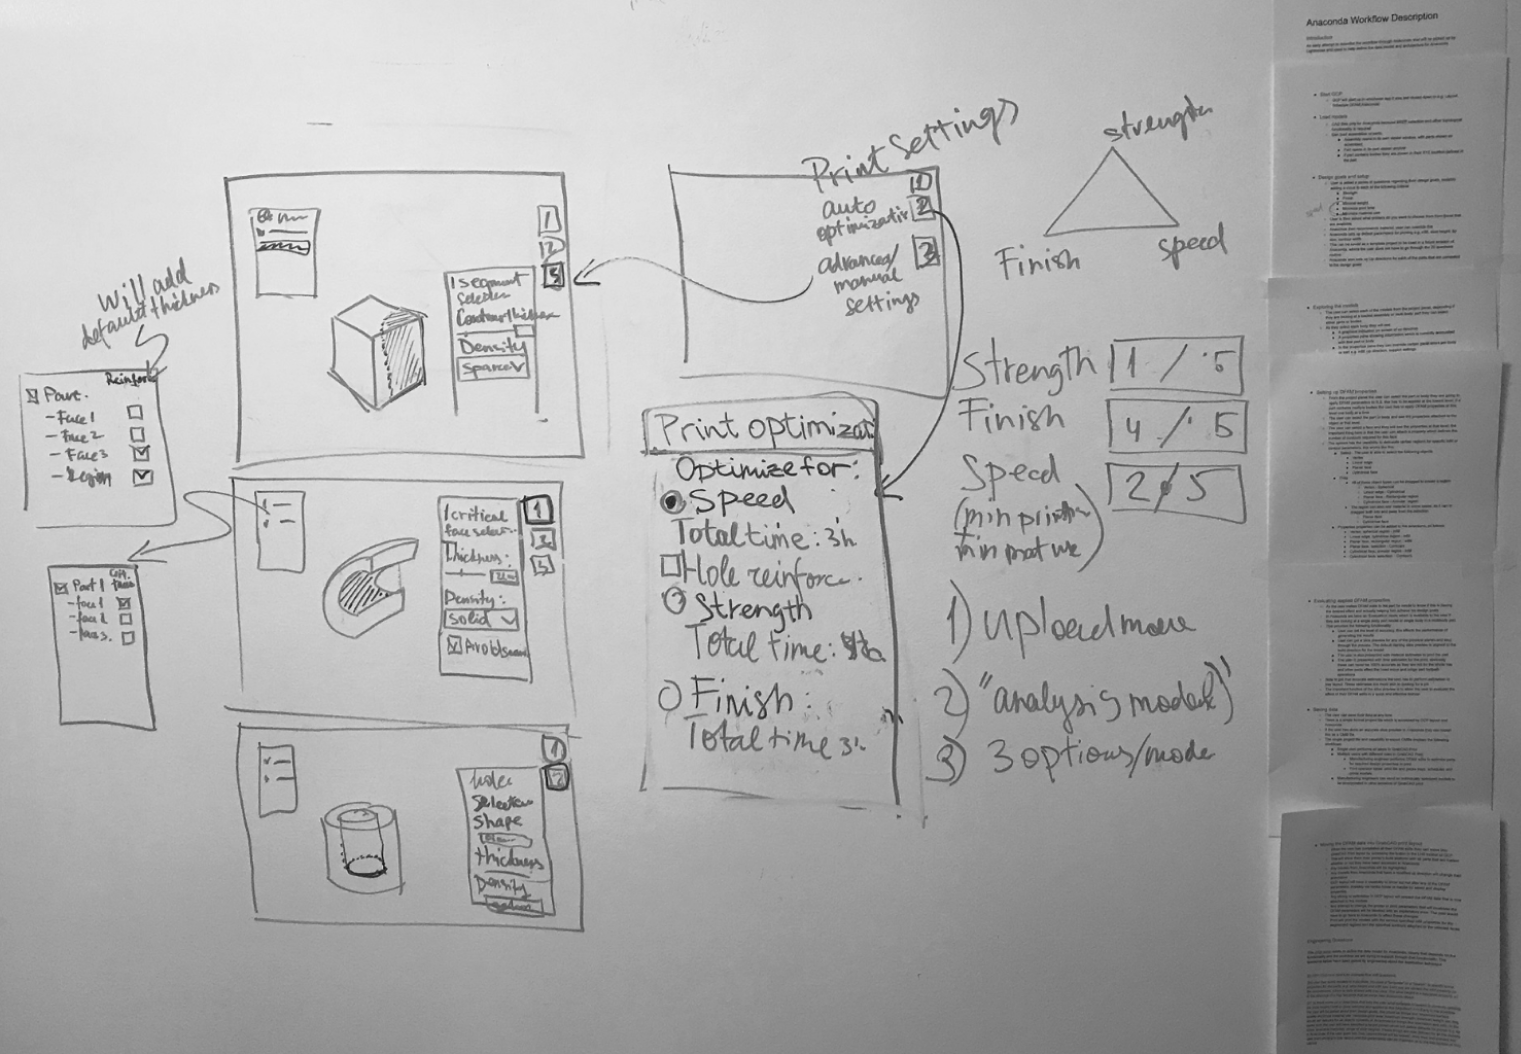
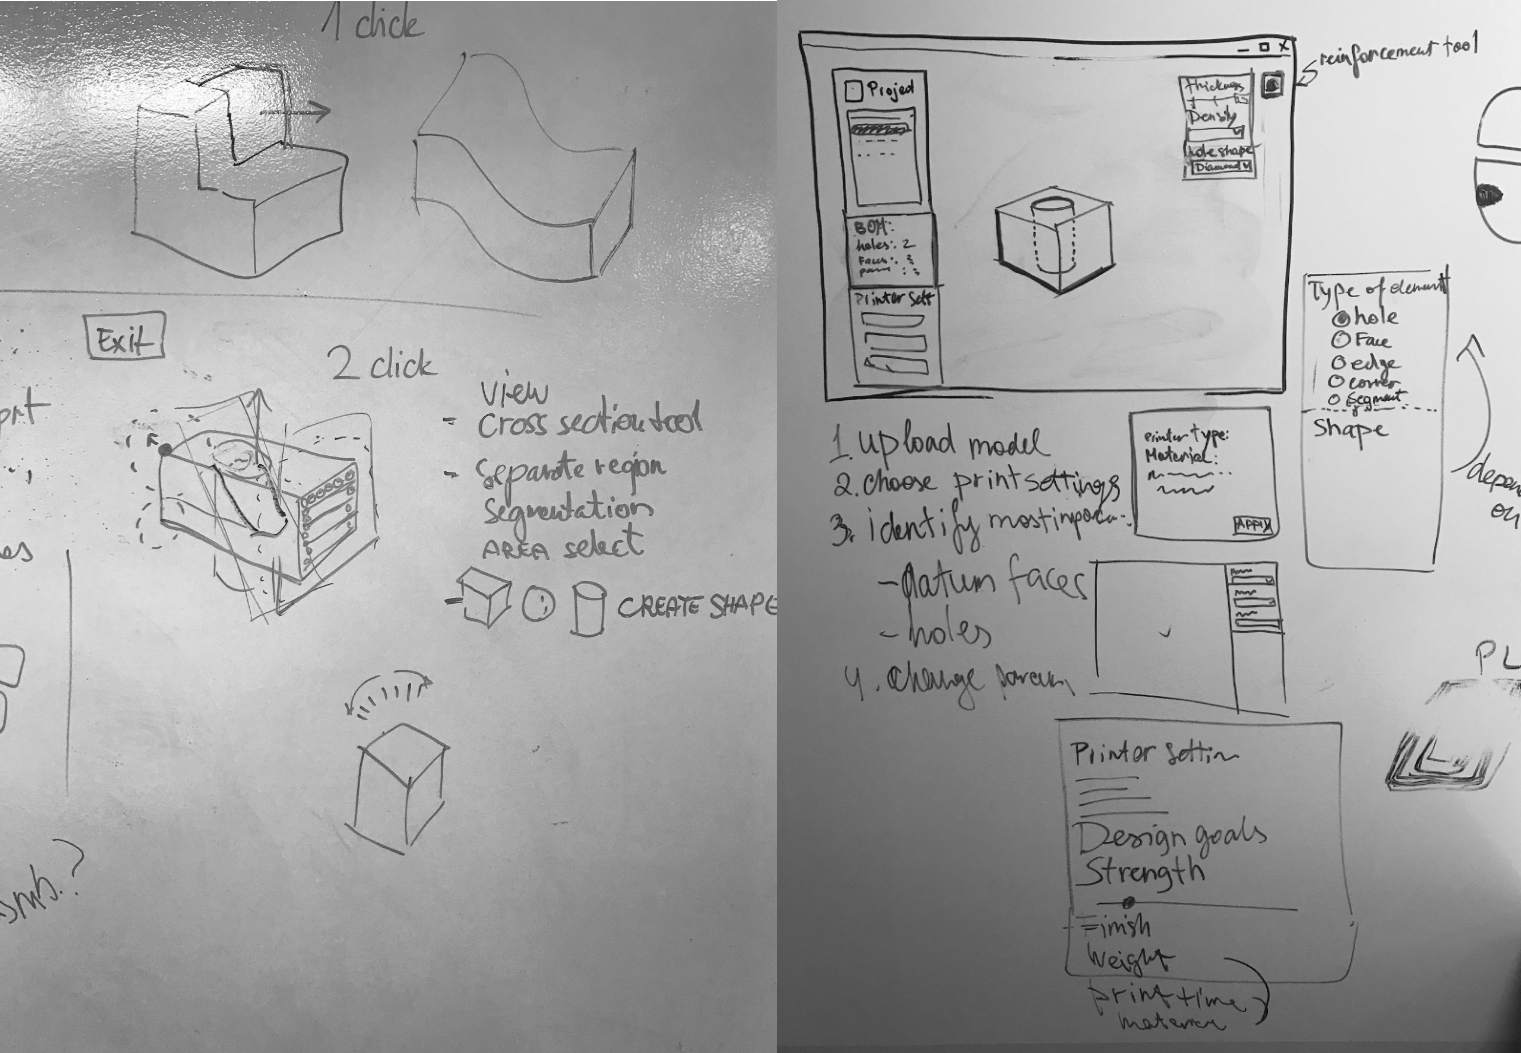
We started out by sketching out different ideas for the UI. We had to figure out where the add-on will live in the current application, and how the user will be ably to apply properties to the 3D models to communicate his/her design intent.
Concept development: Focus on the model
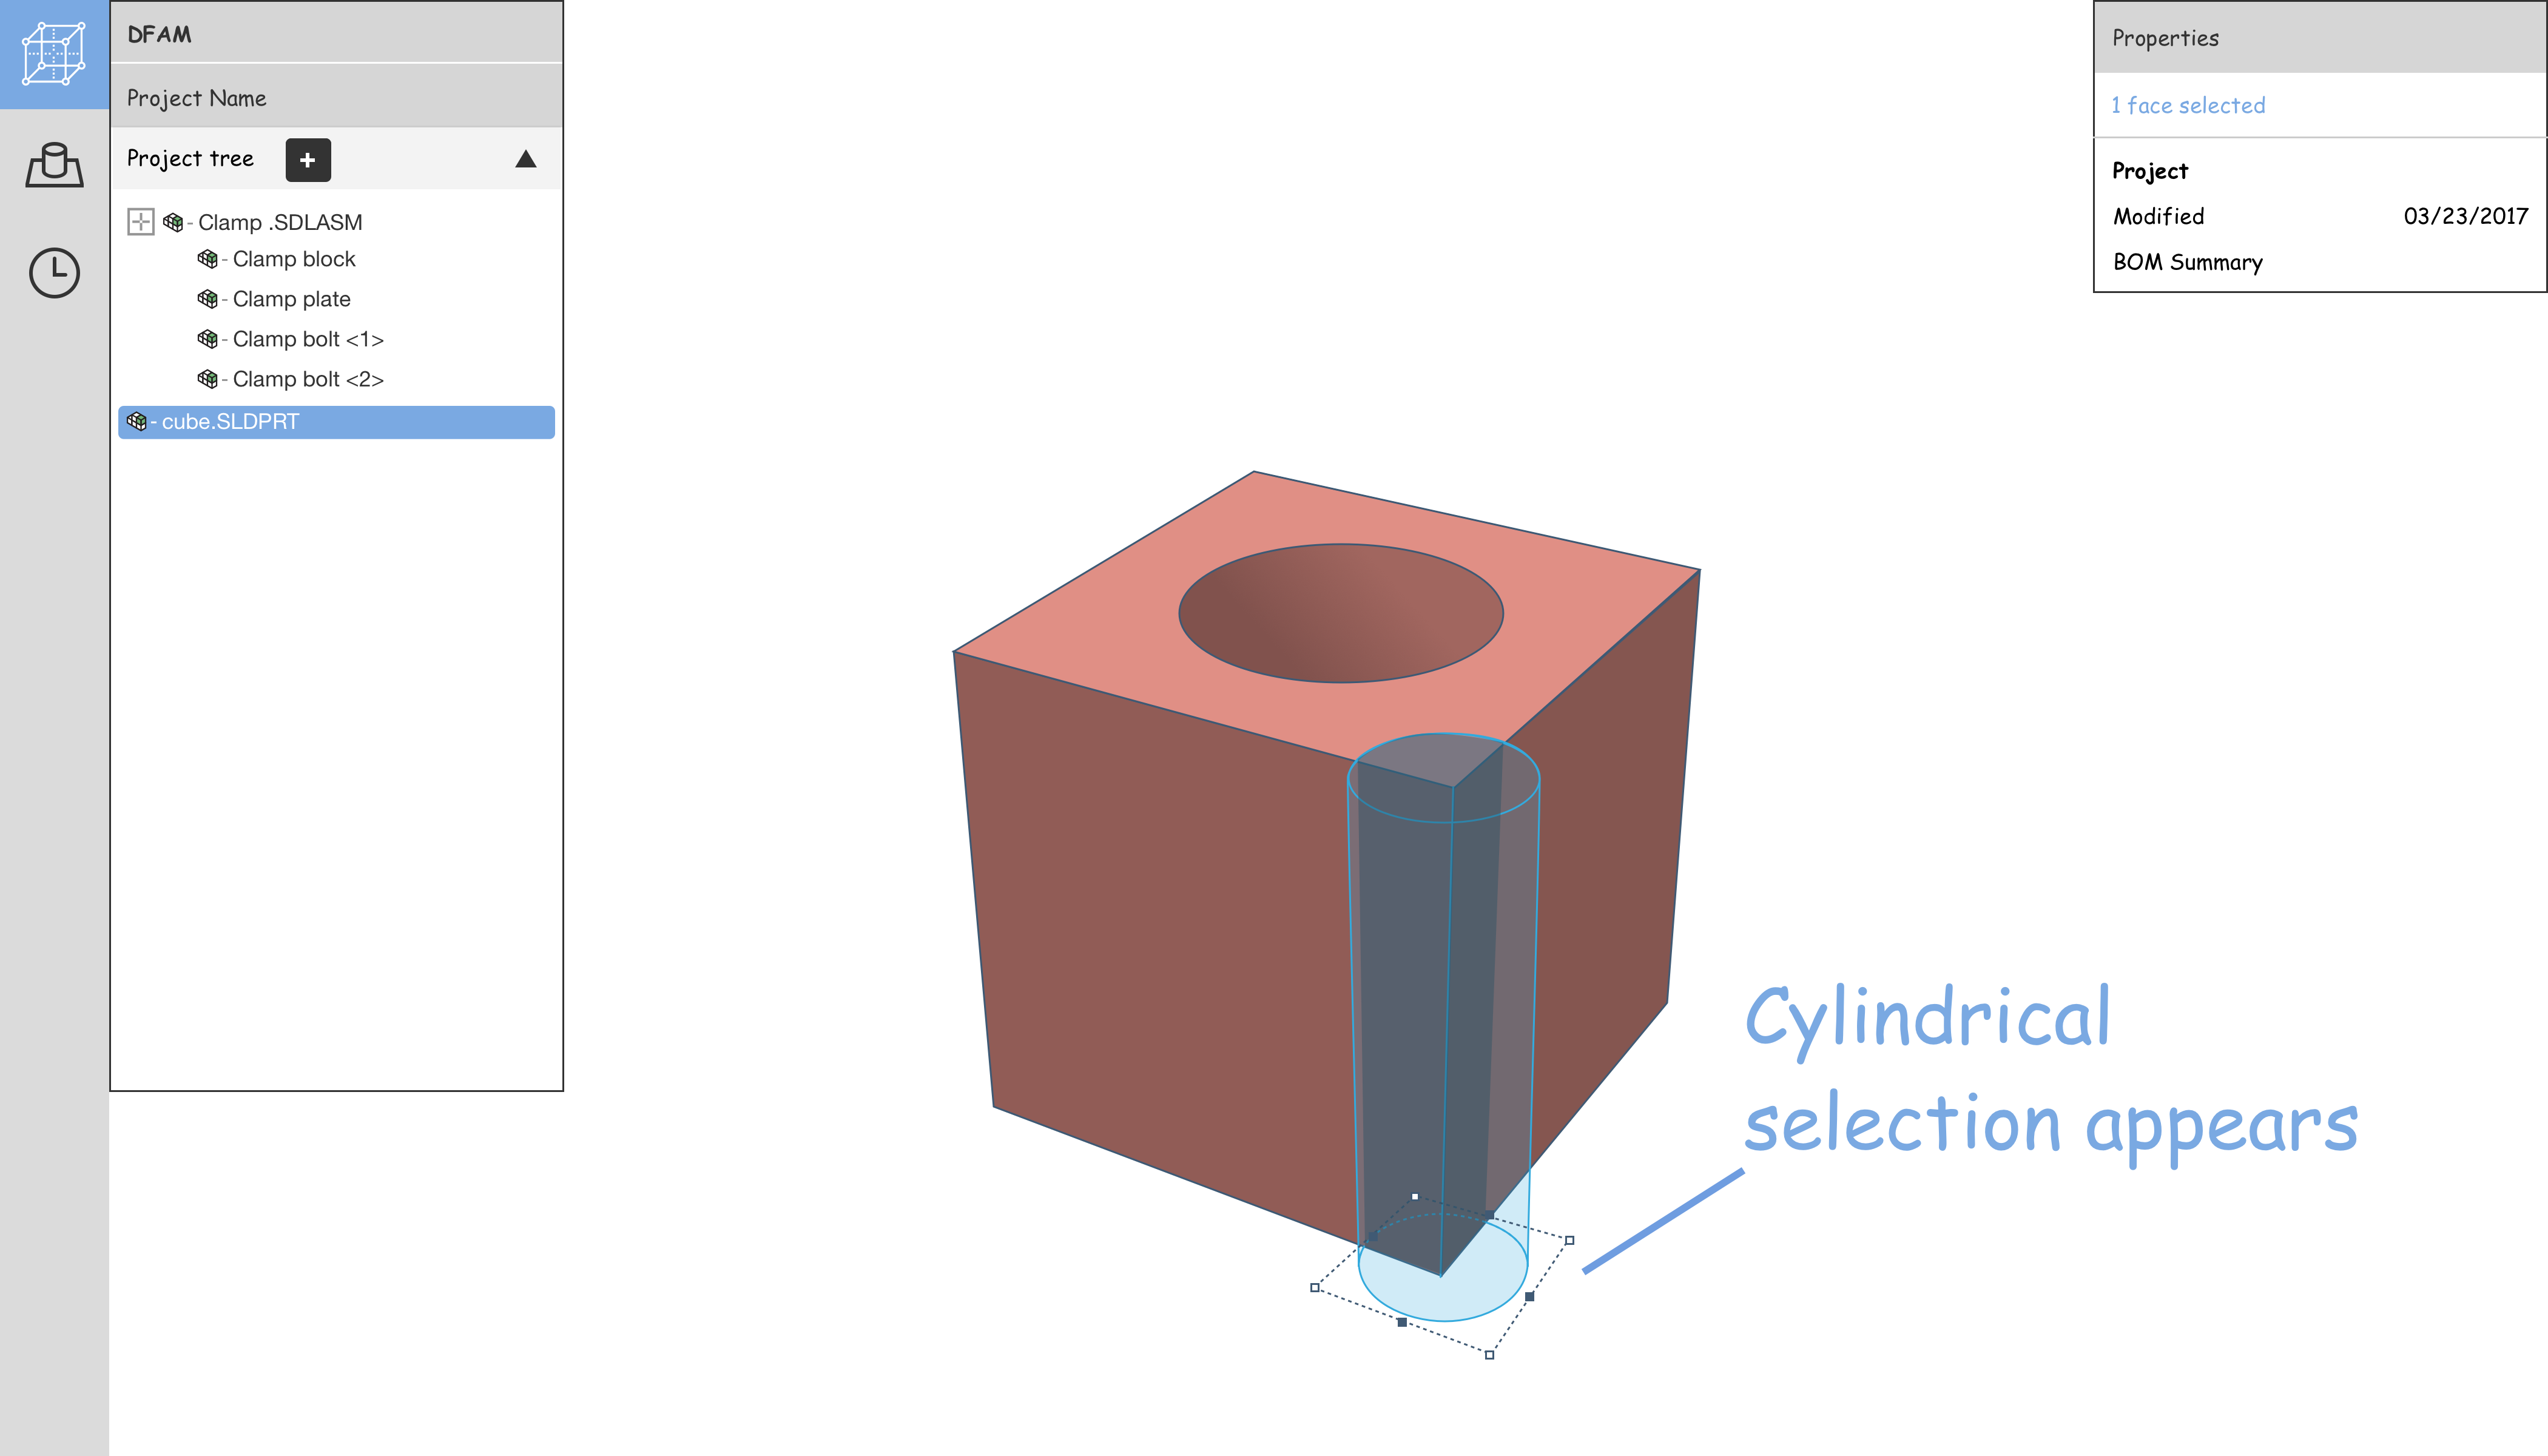
We decided to explore an option of adding this app as a separate tab on the left bar. The user will be able to interact with the model to strengthen parts of it when needed.
Here are a few screenshots of the workflow that we mocked up and presented to the stakeholders, including a few customers.
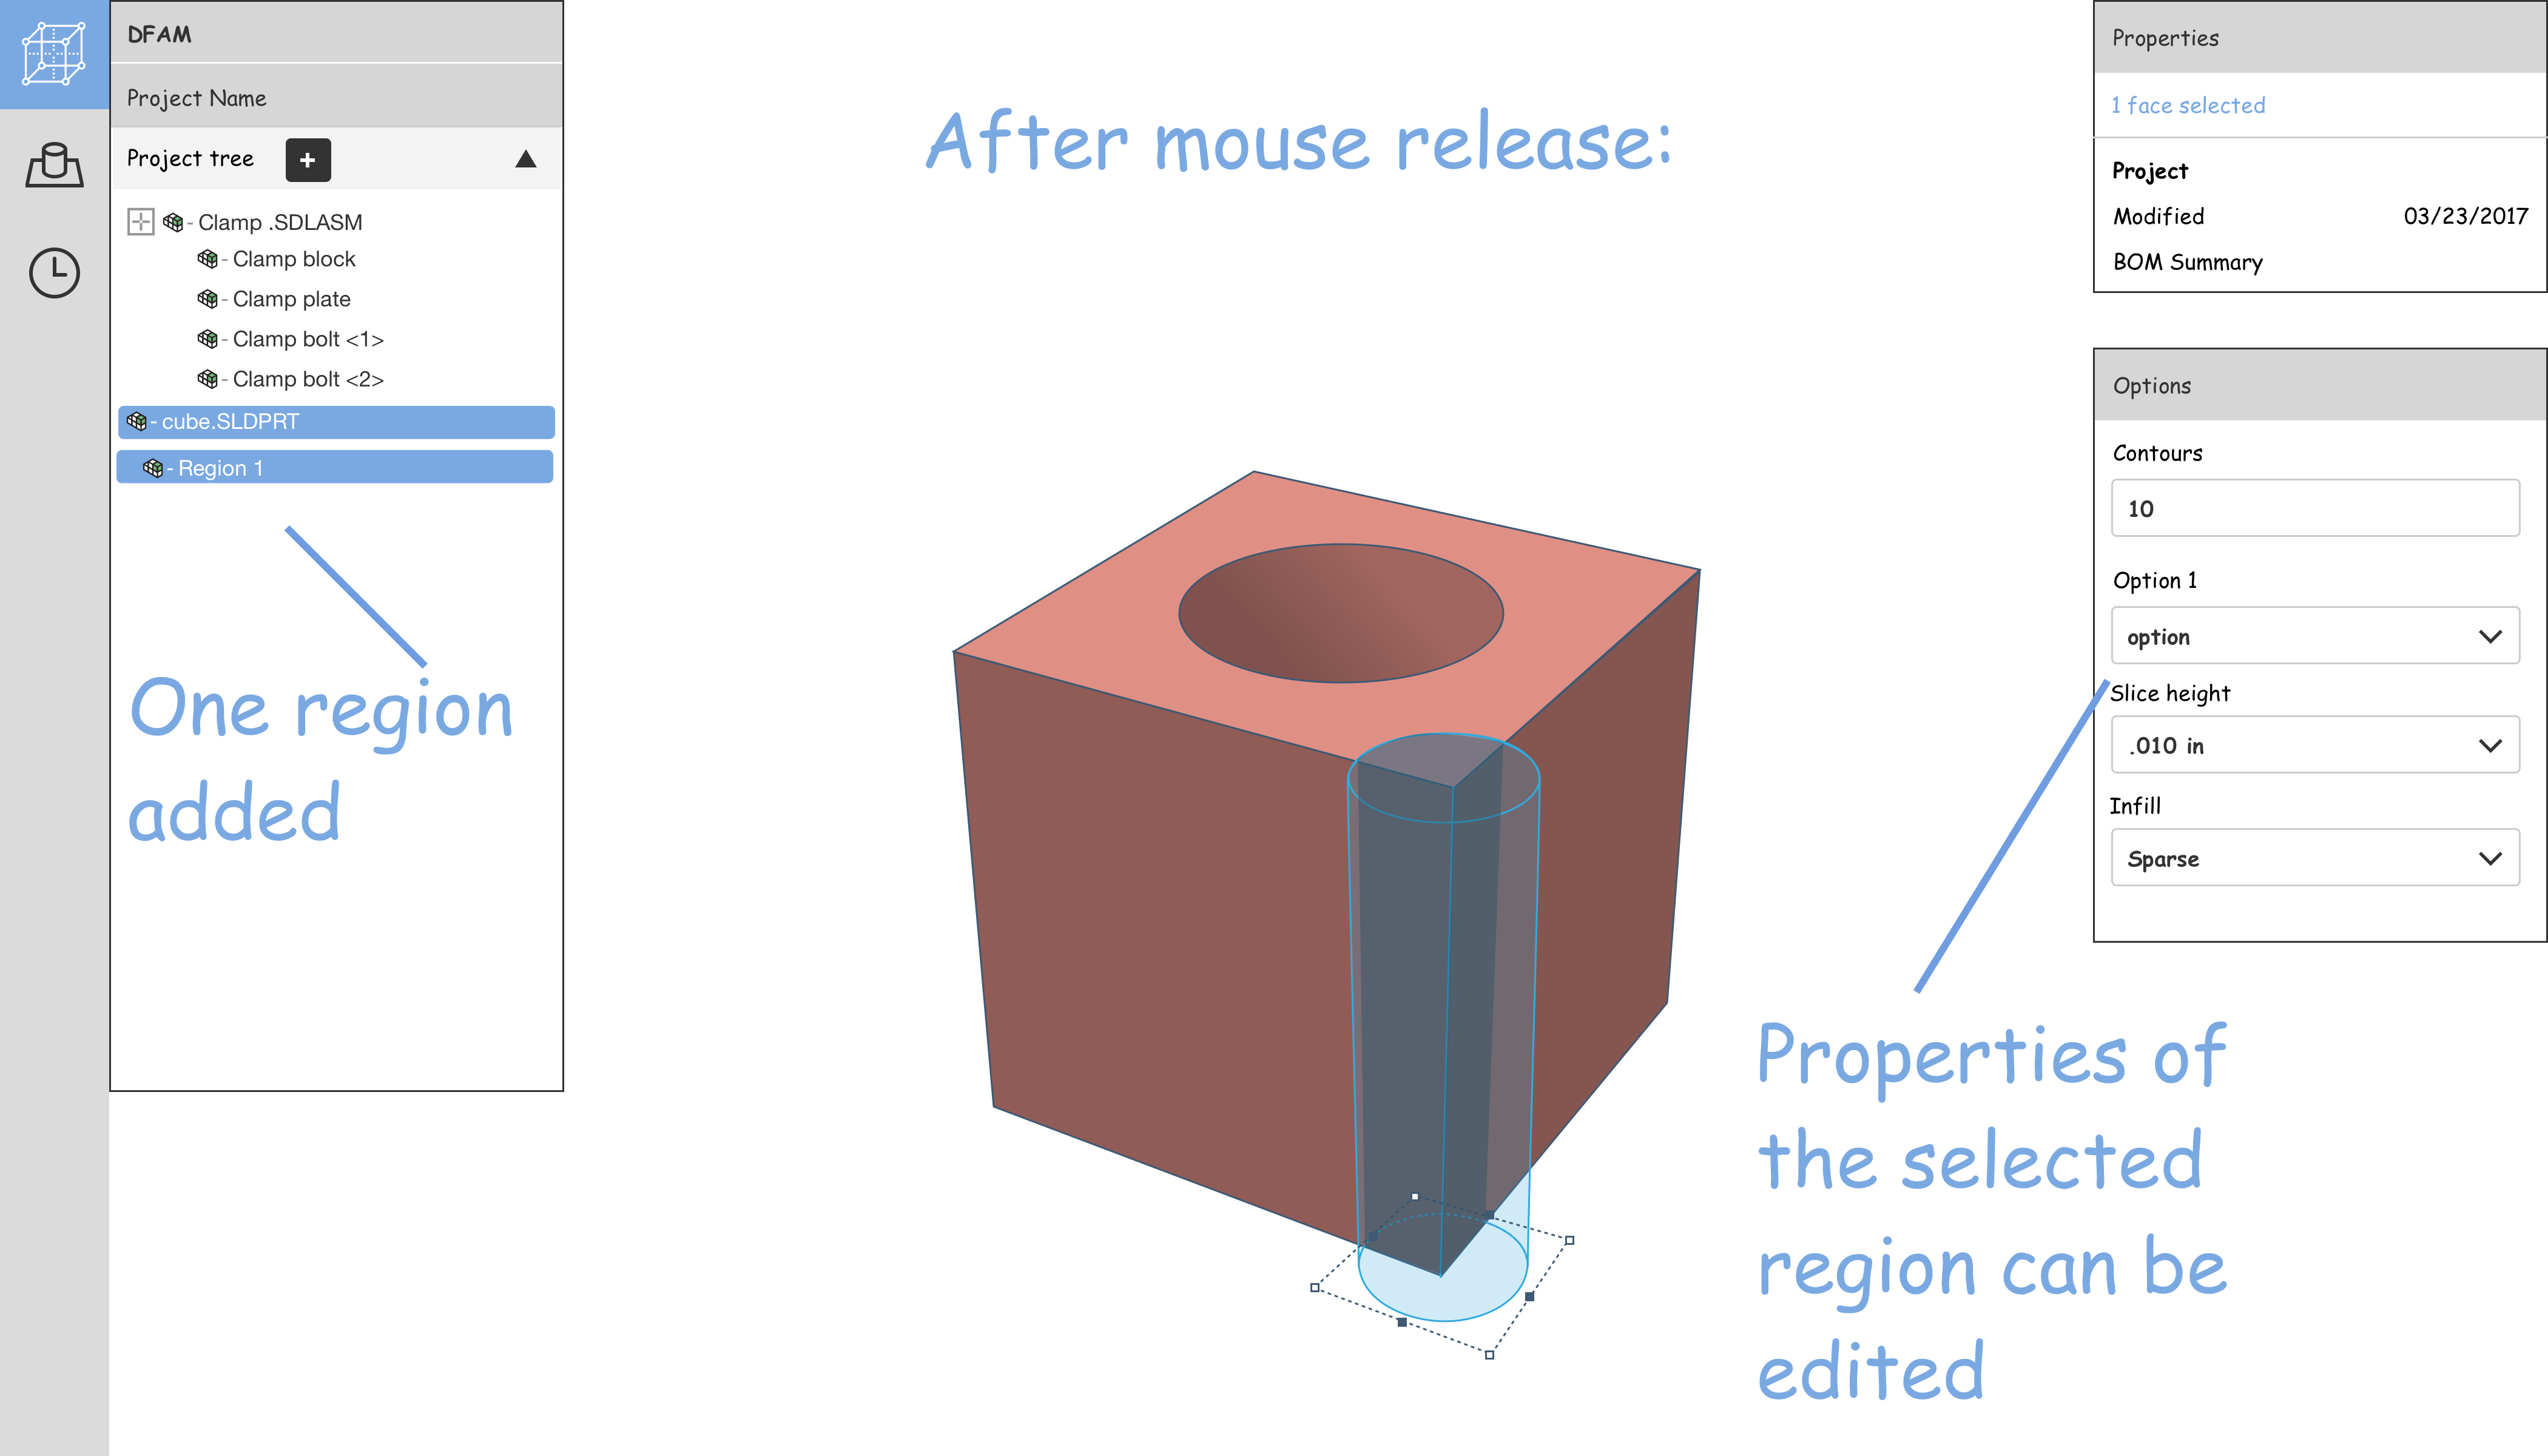
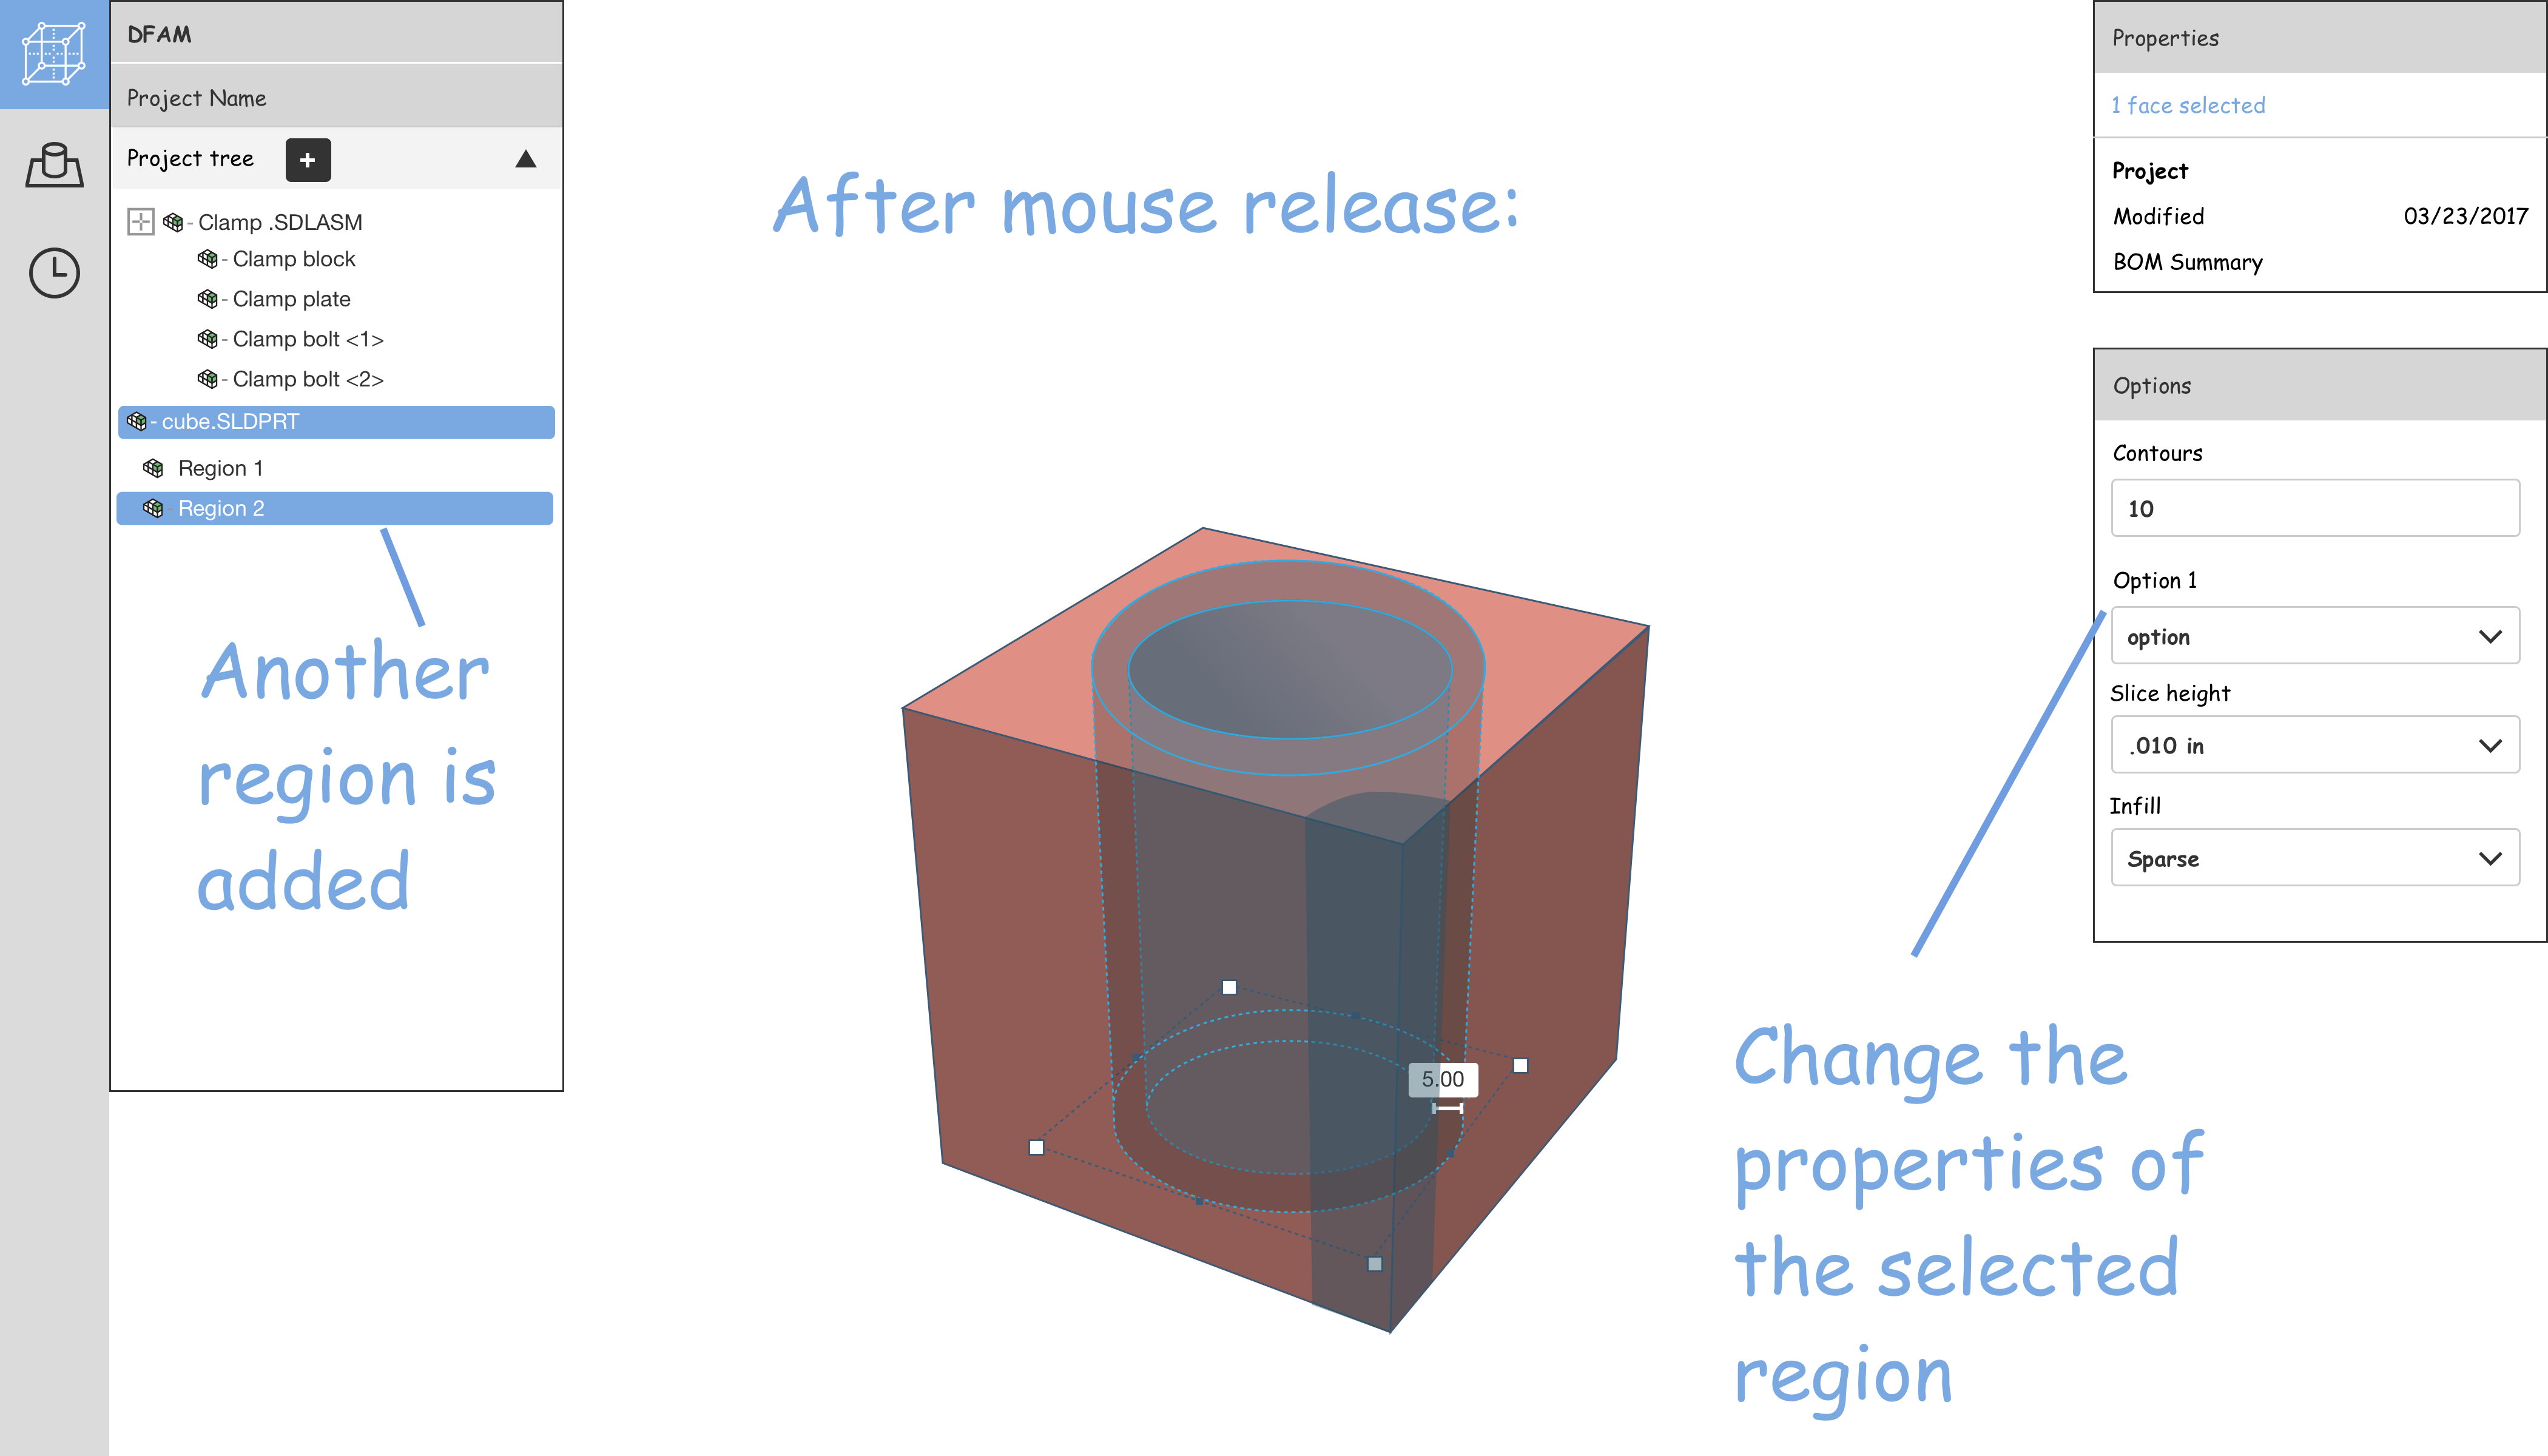
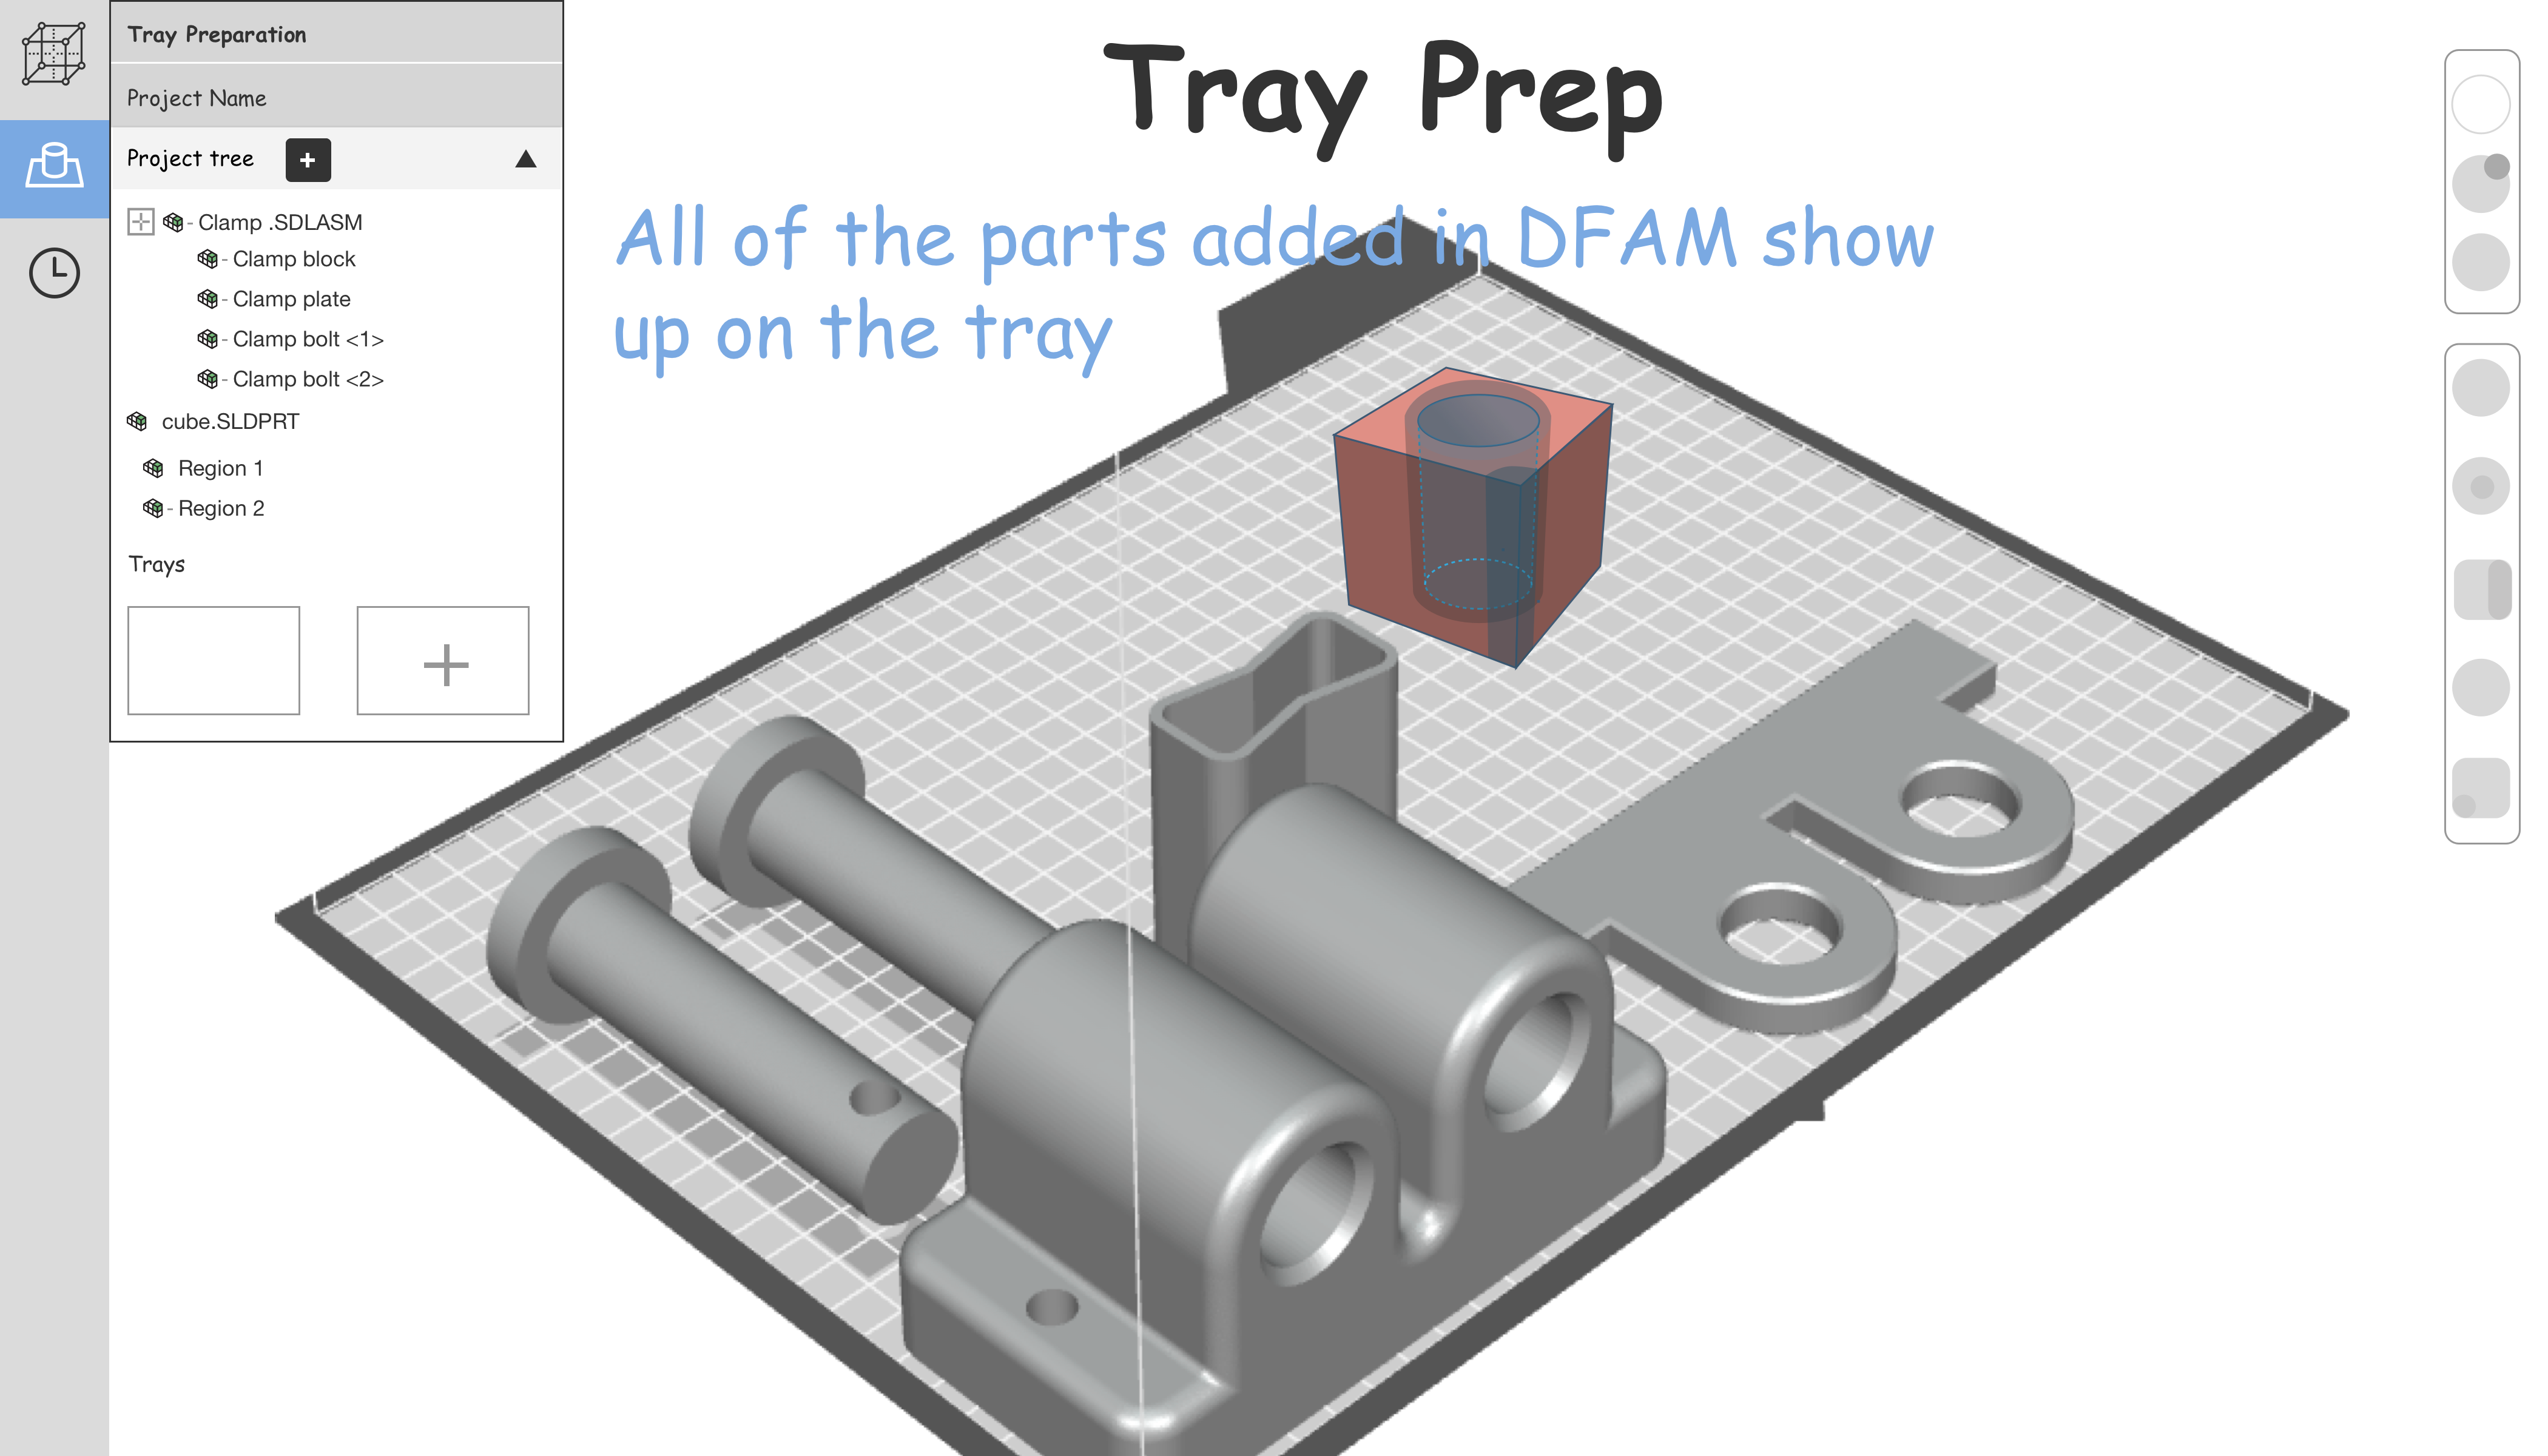
After a few iterations, this direction was approved, and we continued to develop it further. The challenge now was to figure out how all the settings will work and where in the UI they will be located.
Context driven UI concept - showing only necessary features whenever they are needed. This is a very interesting paradigm, because it helps the user to focus on what they need in the moment. The settings displayed in the right side panel depend on where the user is in their workflow. Another nice part of this concept is the panel on the right that is aways available and all the content is categorized into accordions.
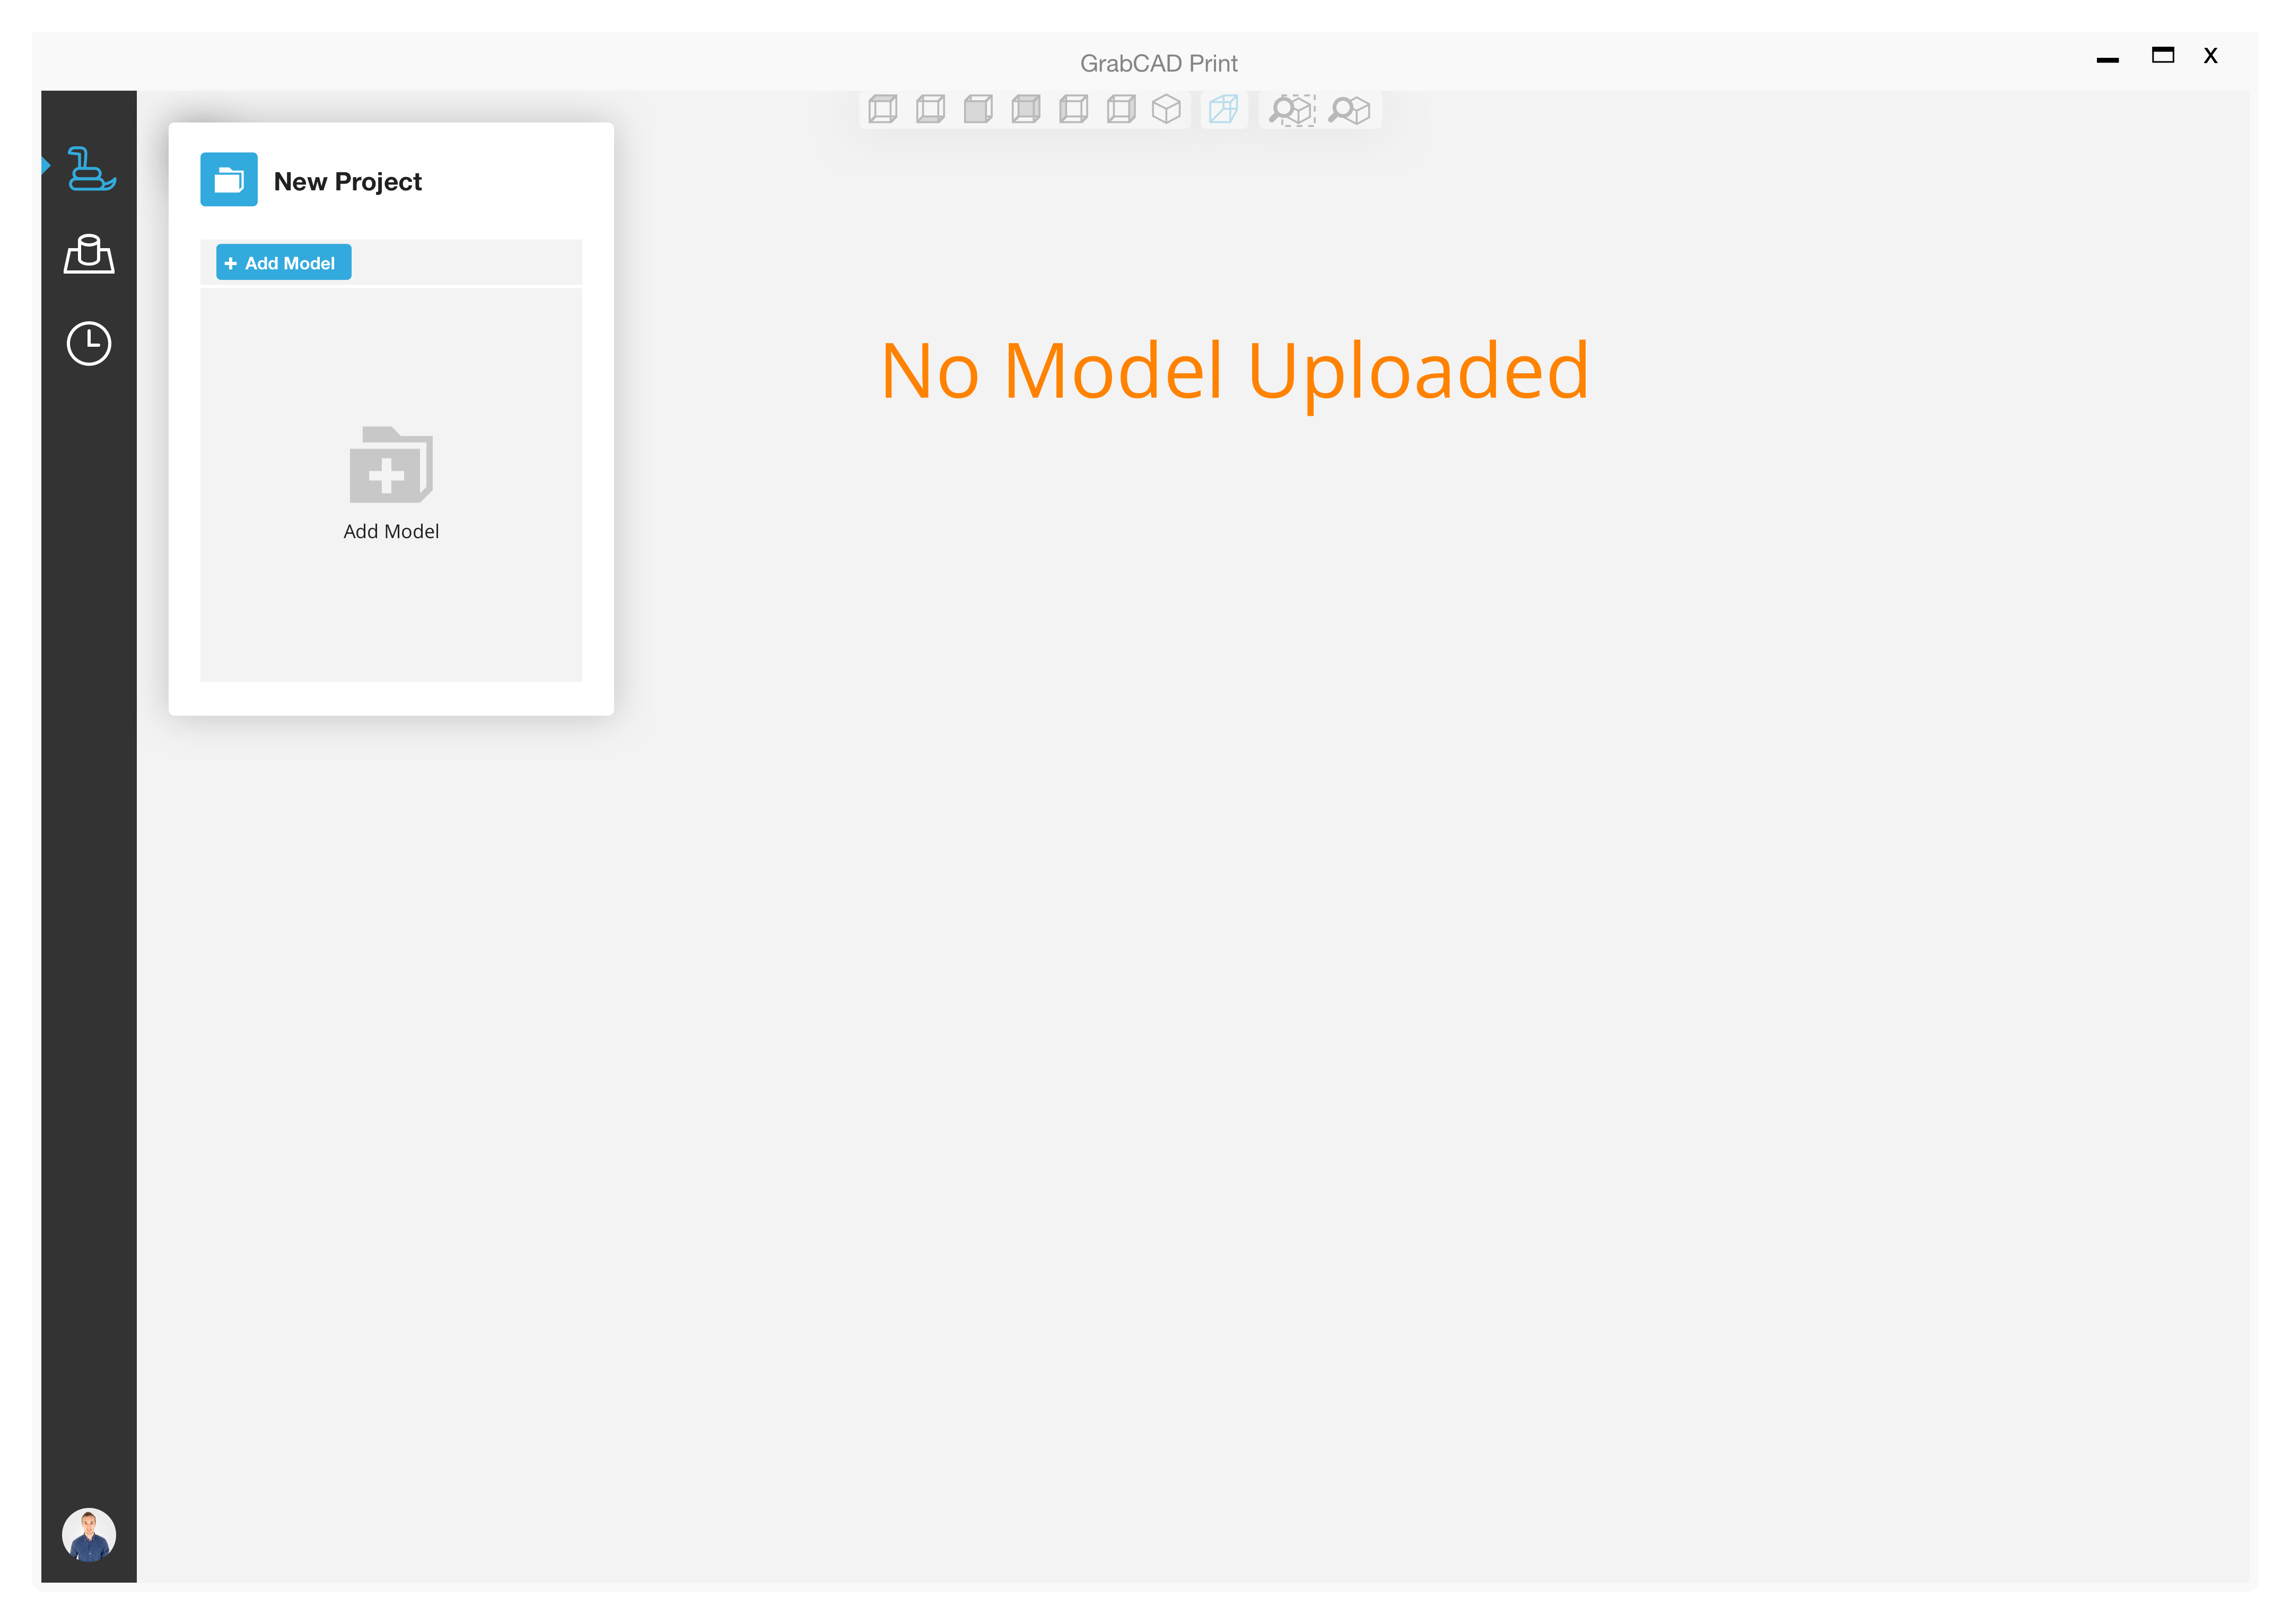
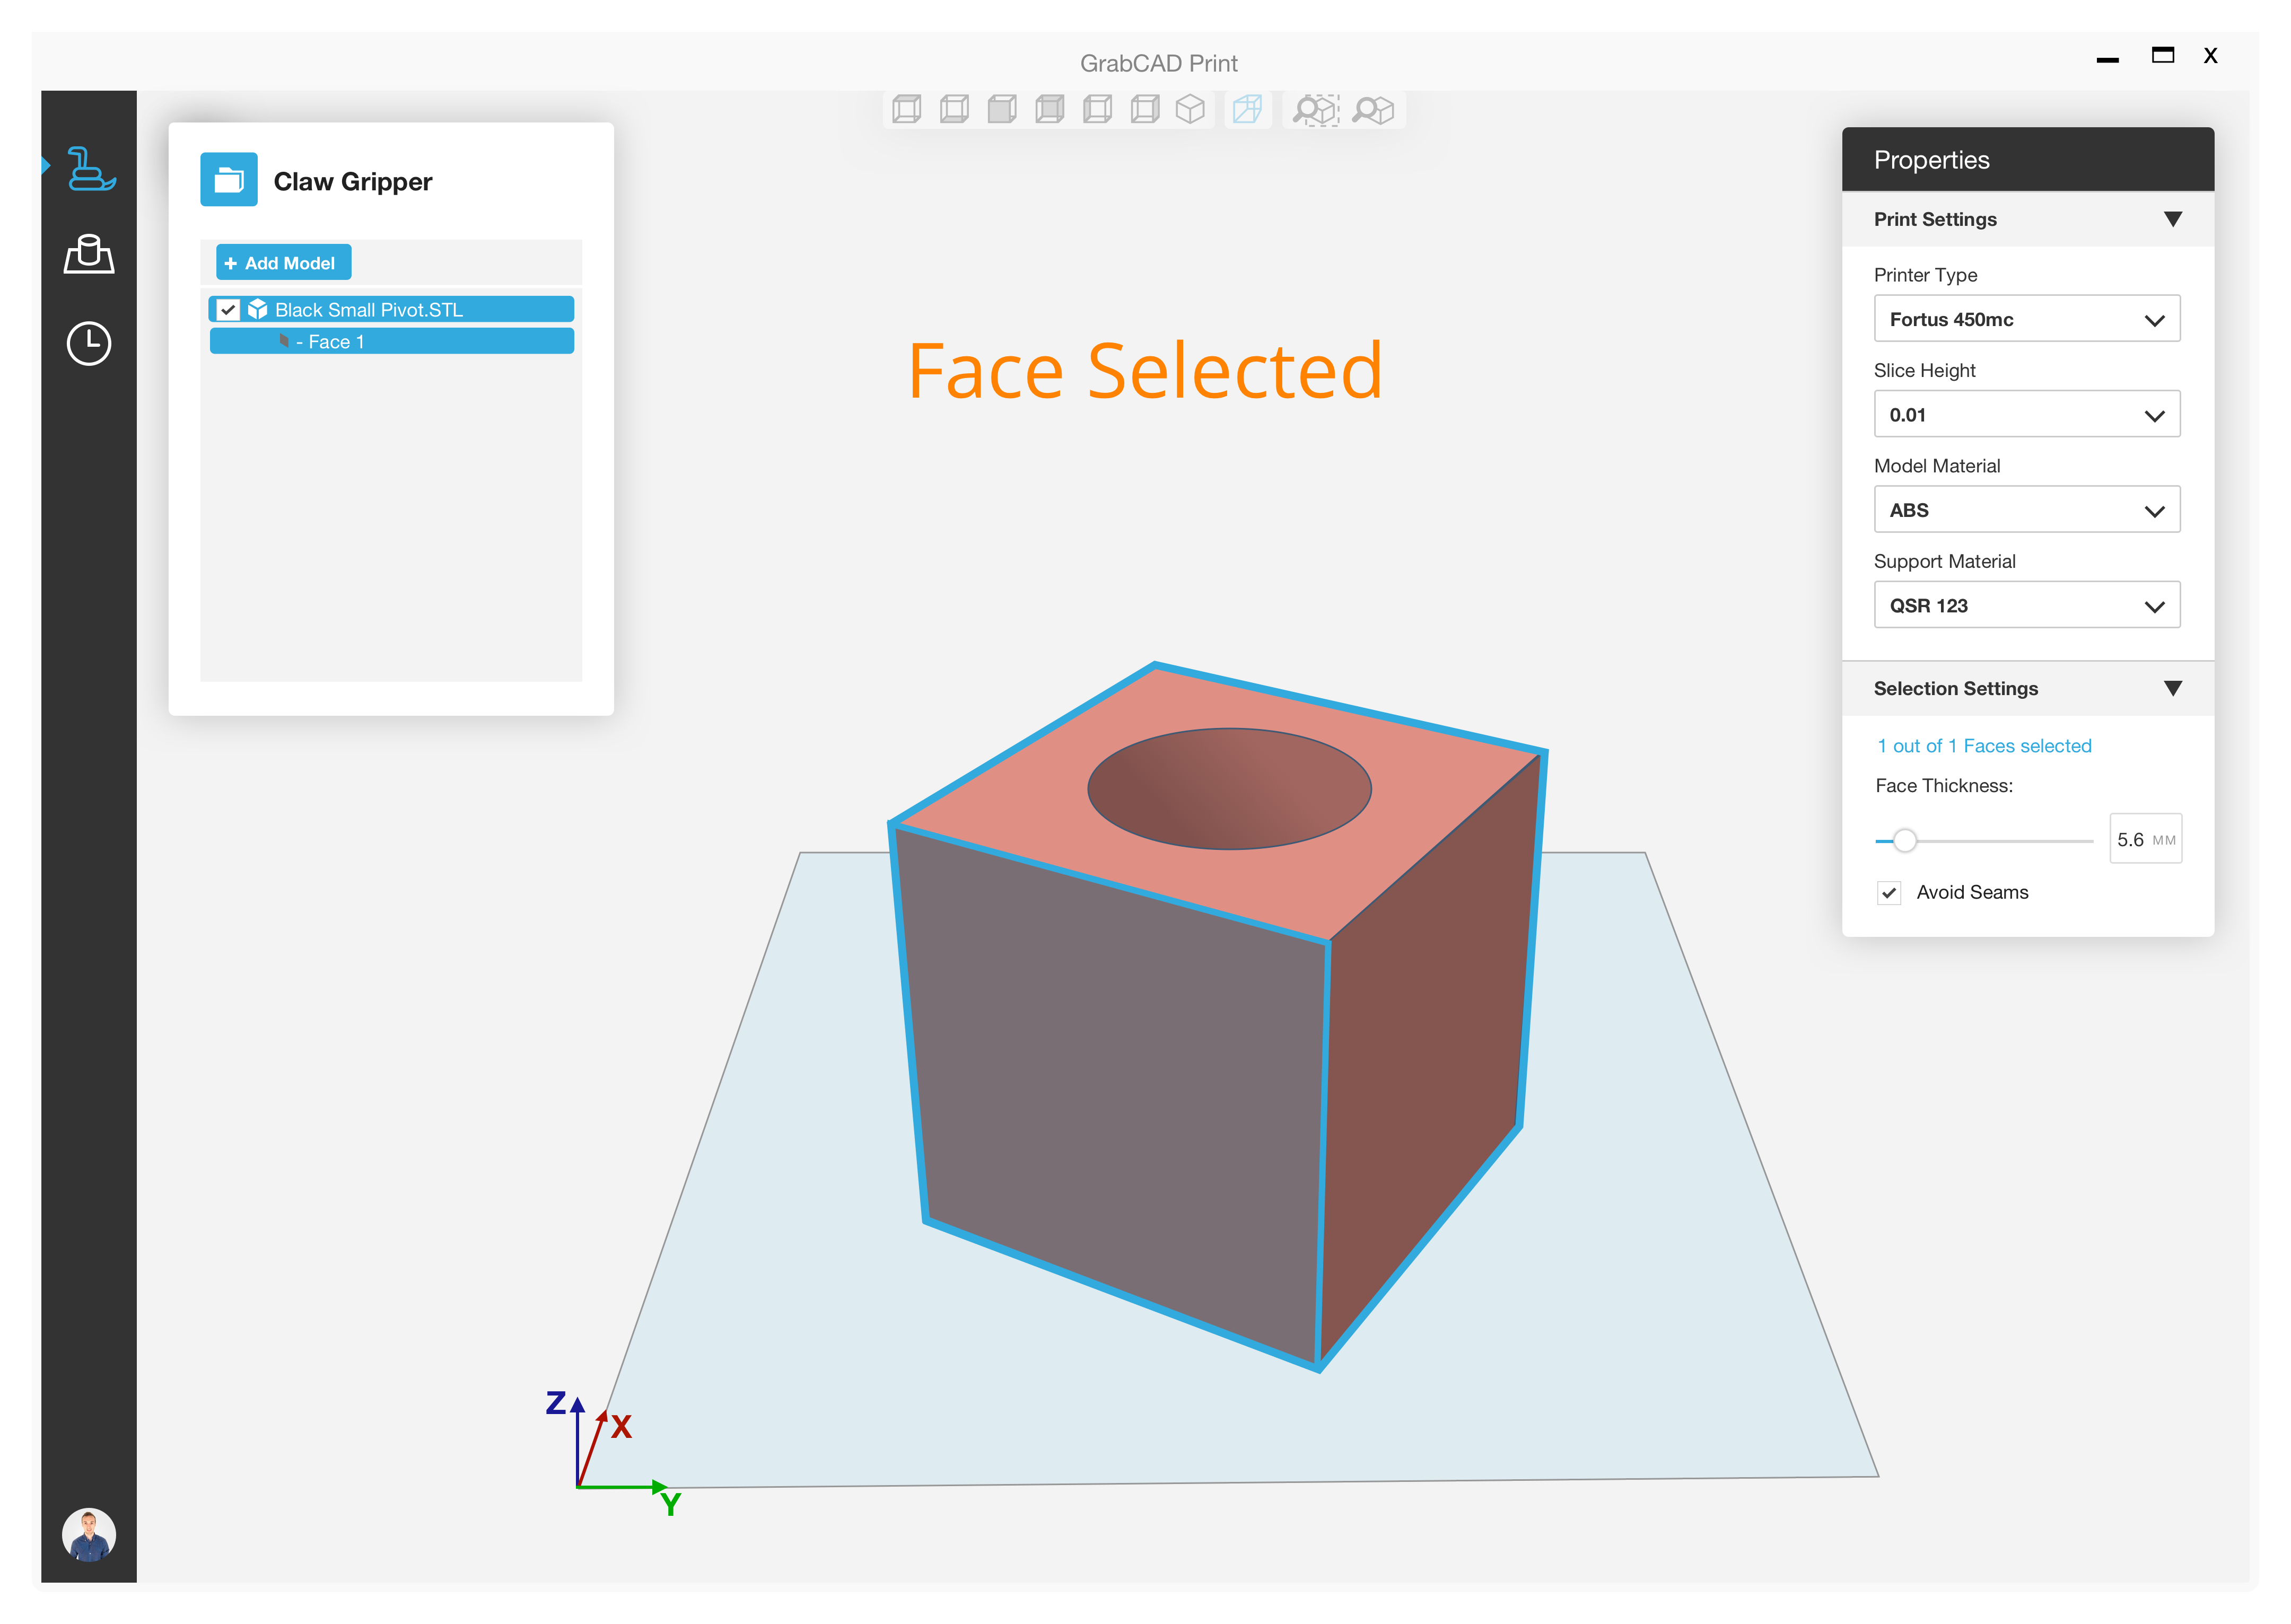
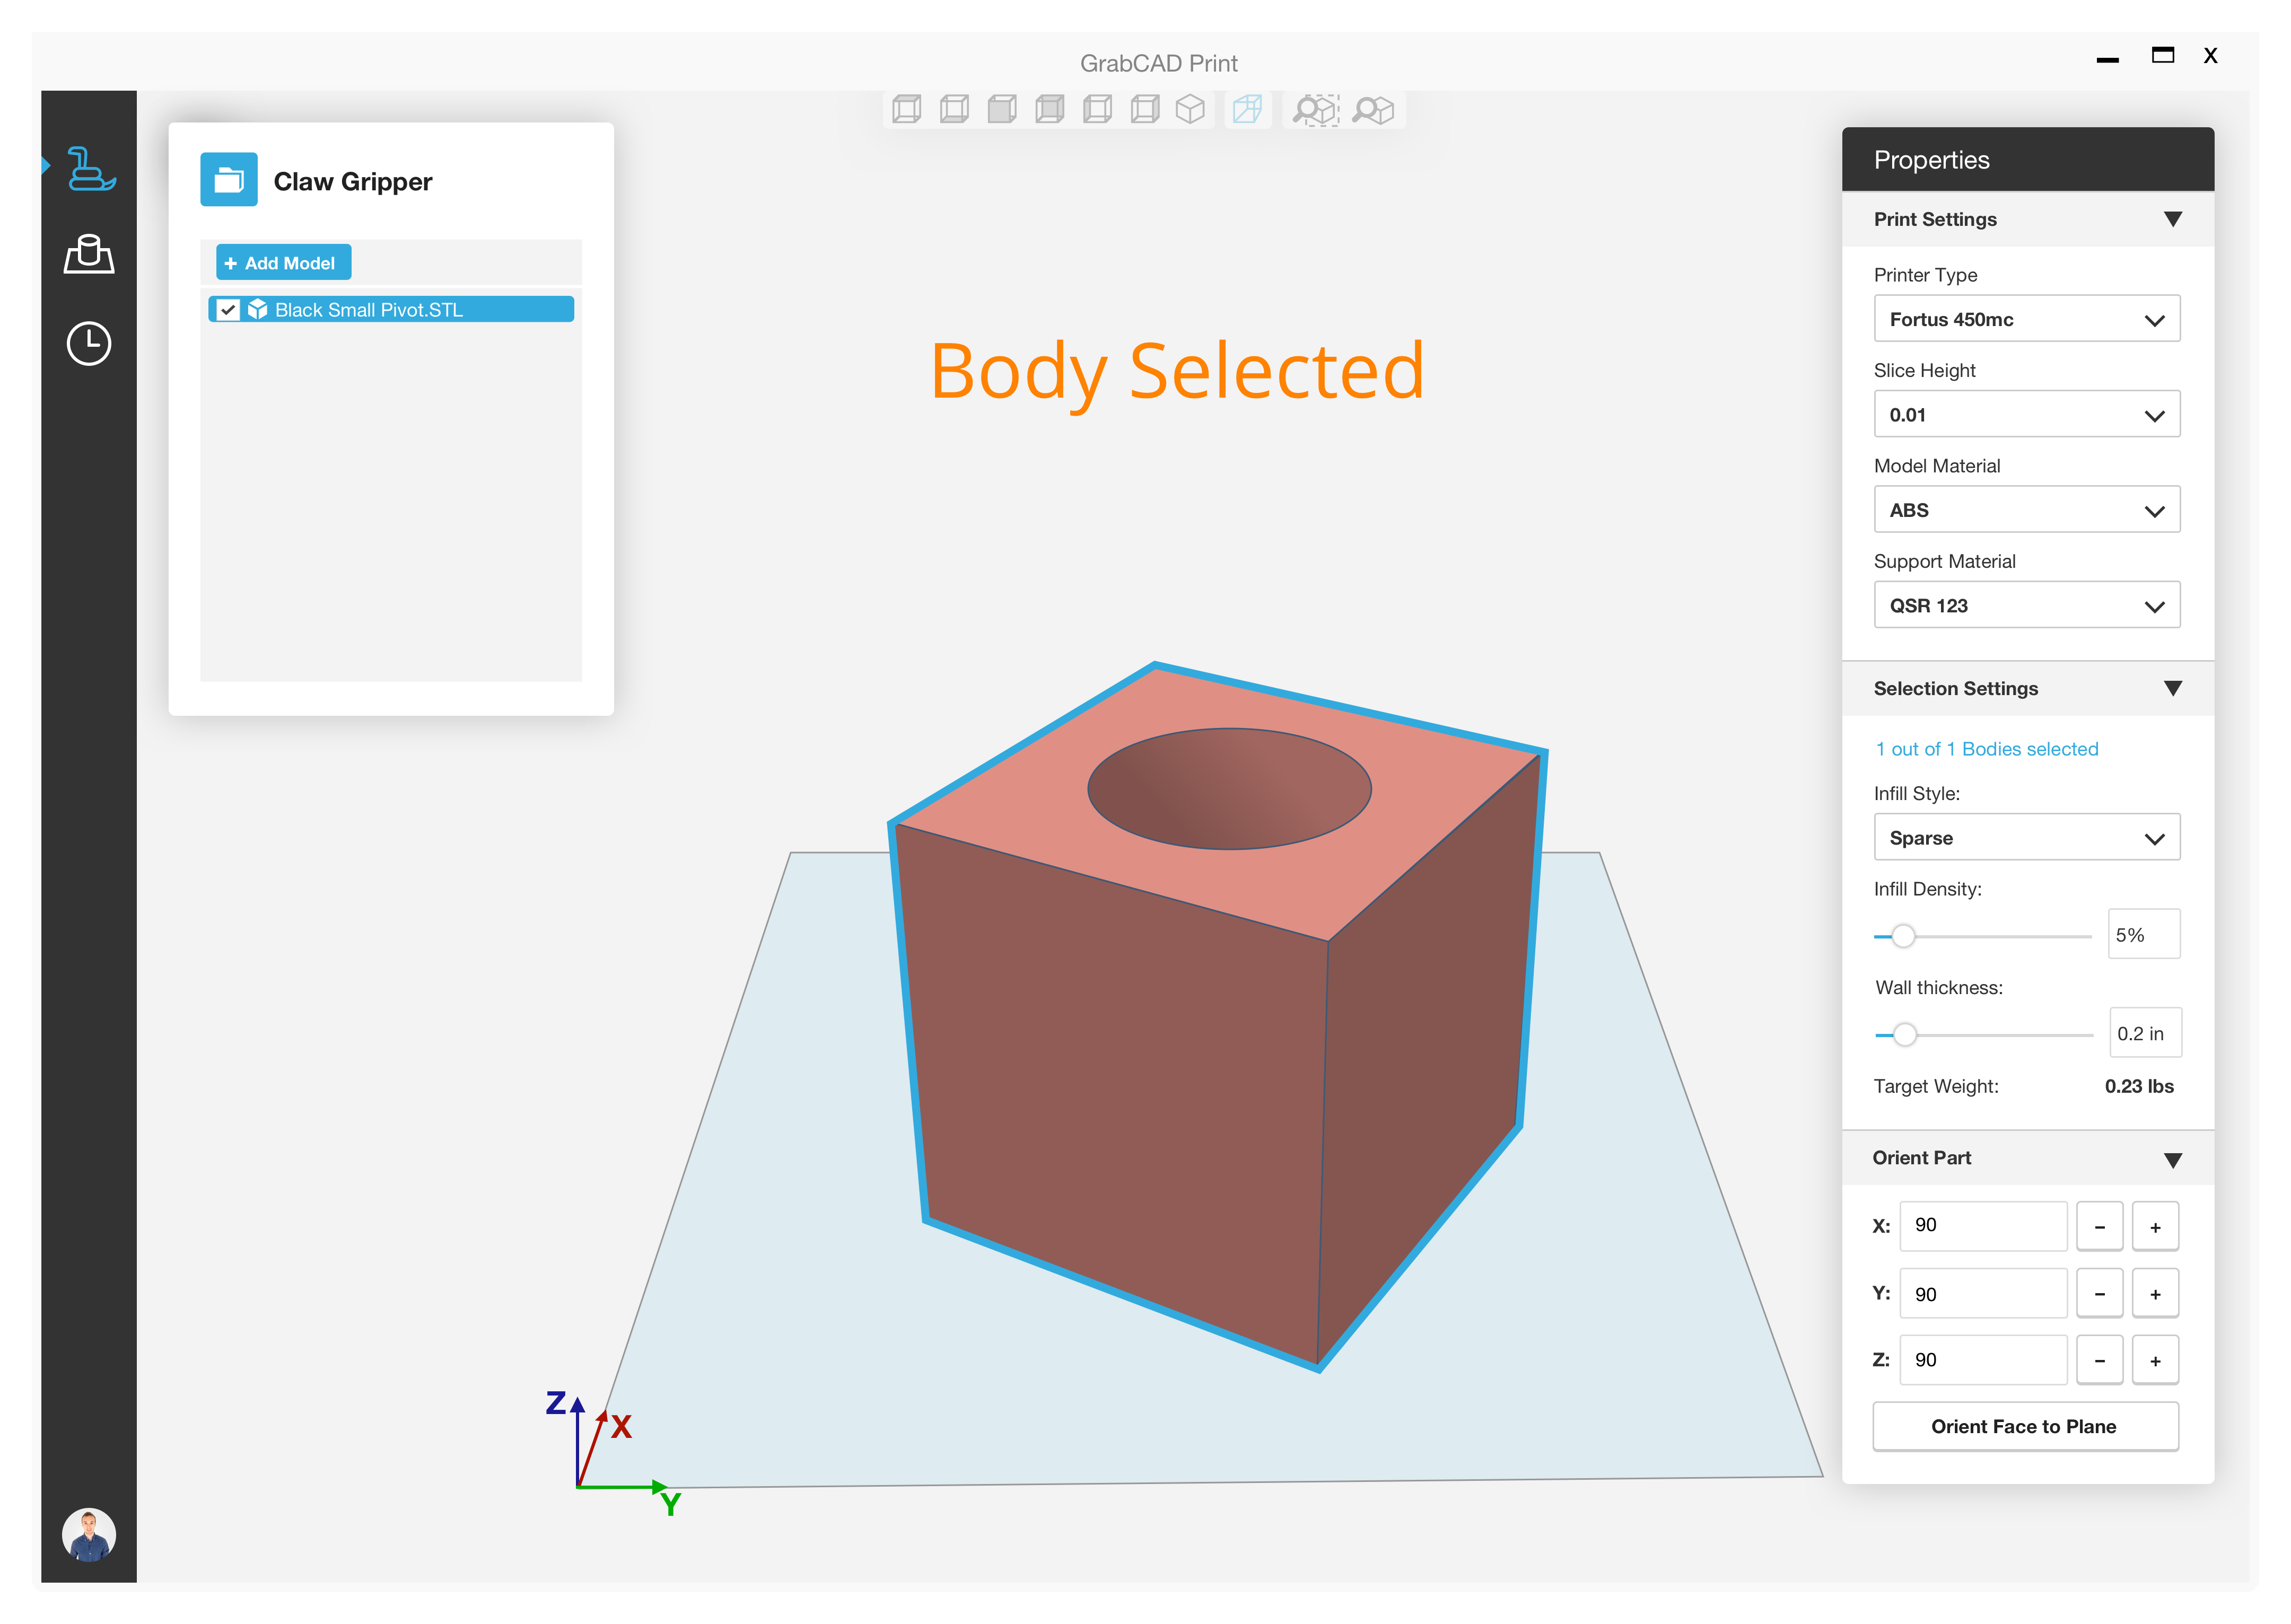
First idea was to have 2 separate accordions for face and body settings, but it didn't solve the selection.
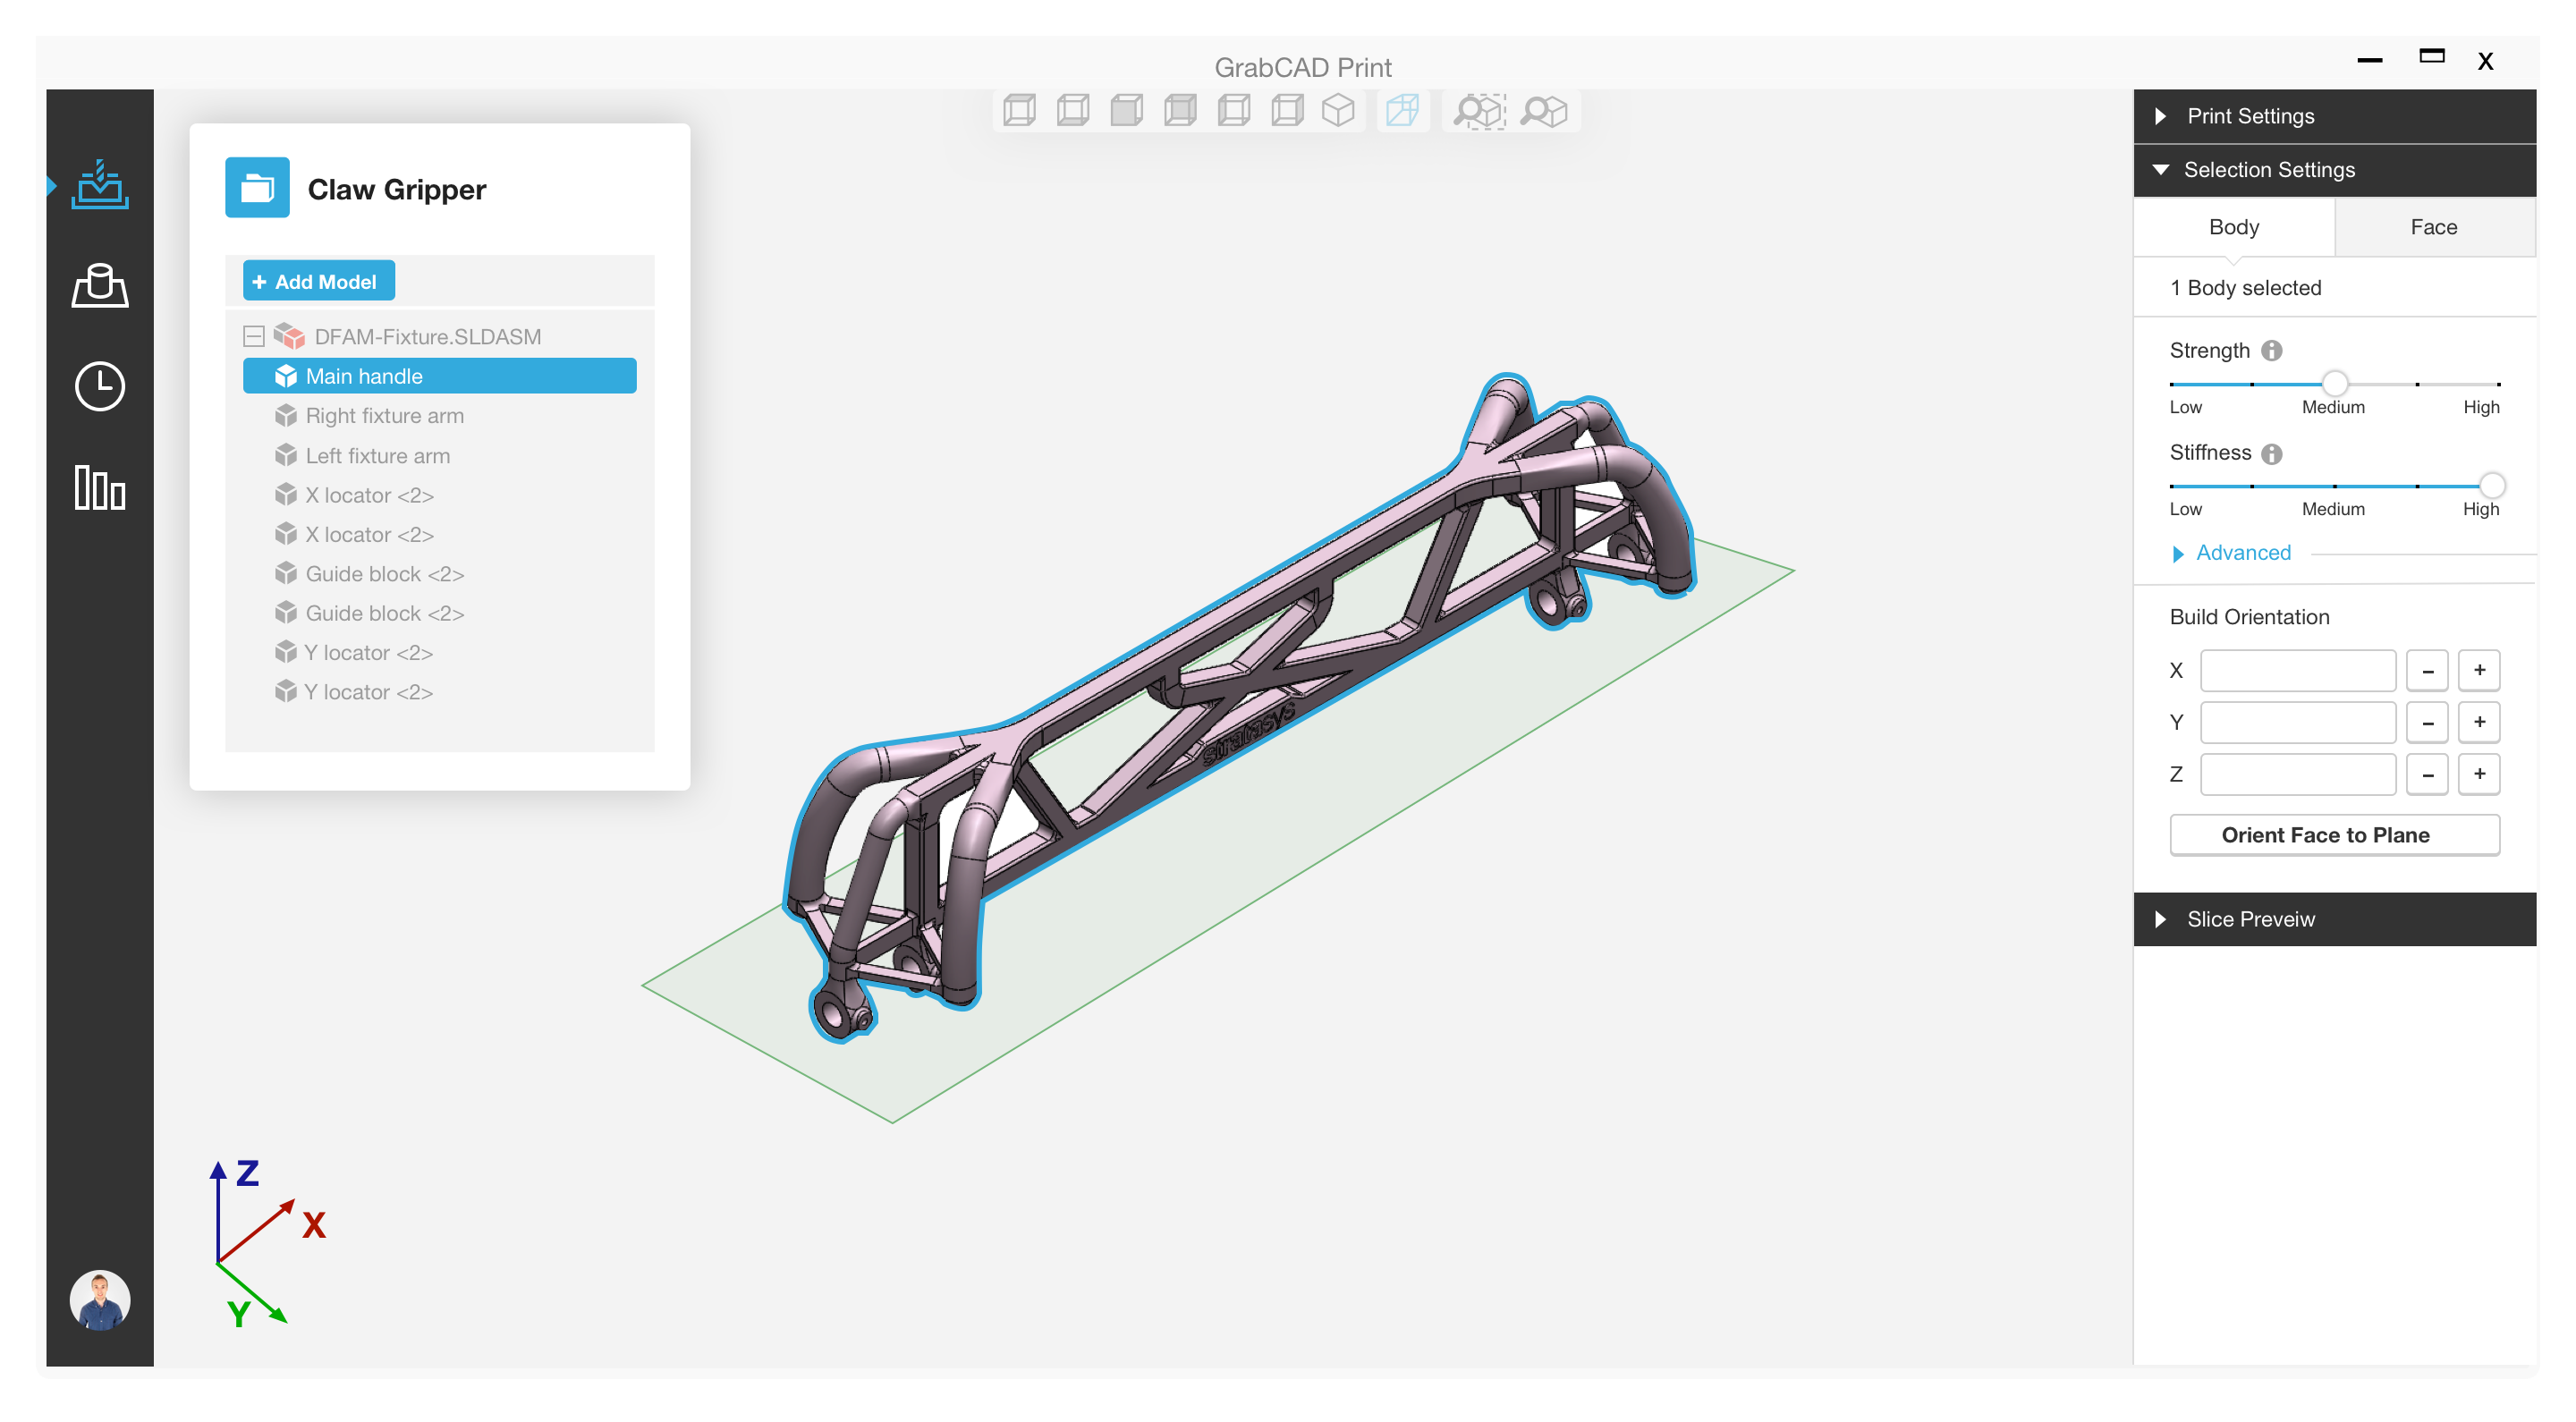
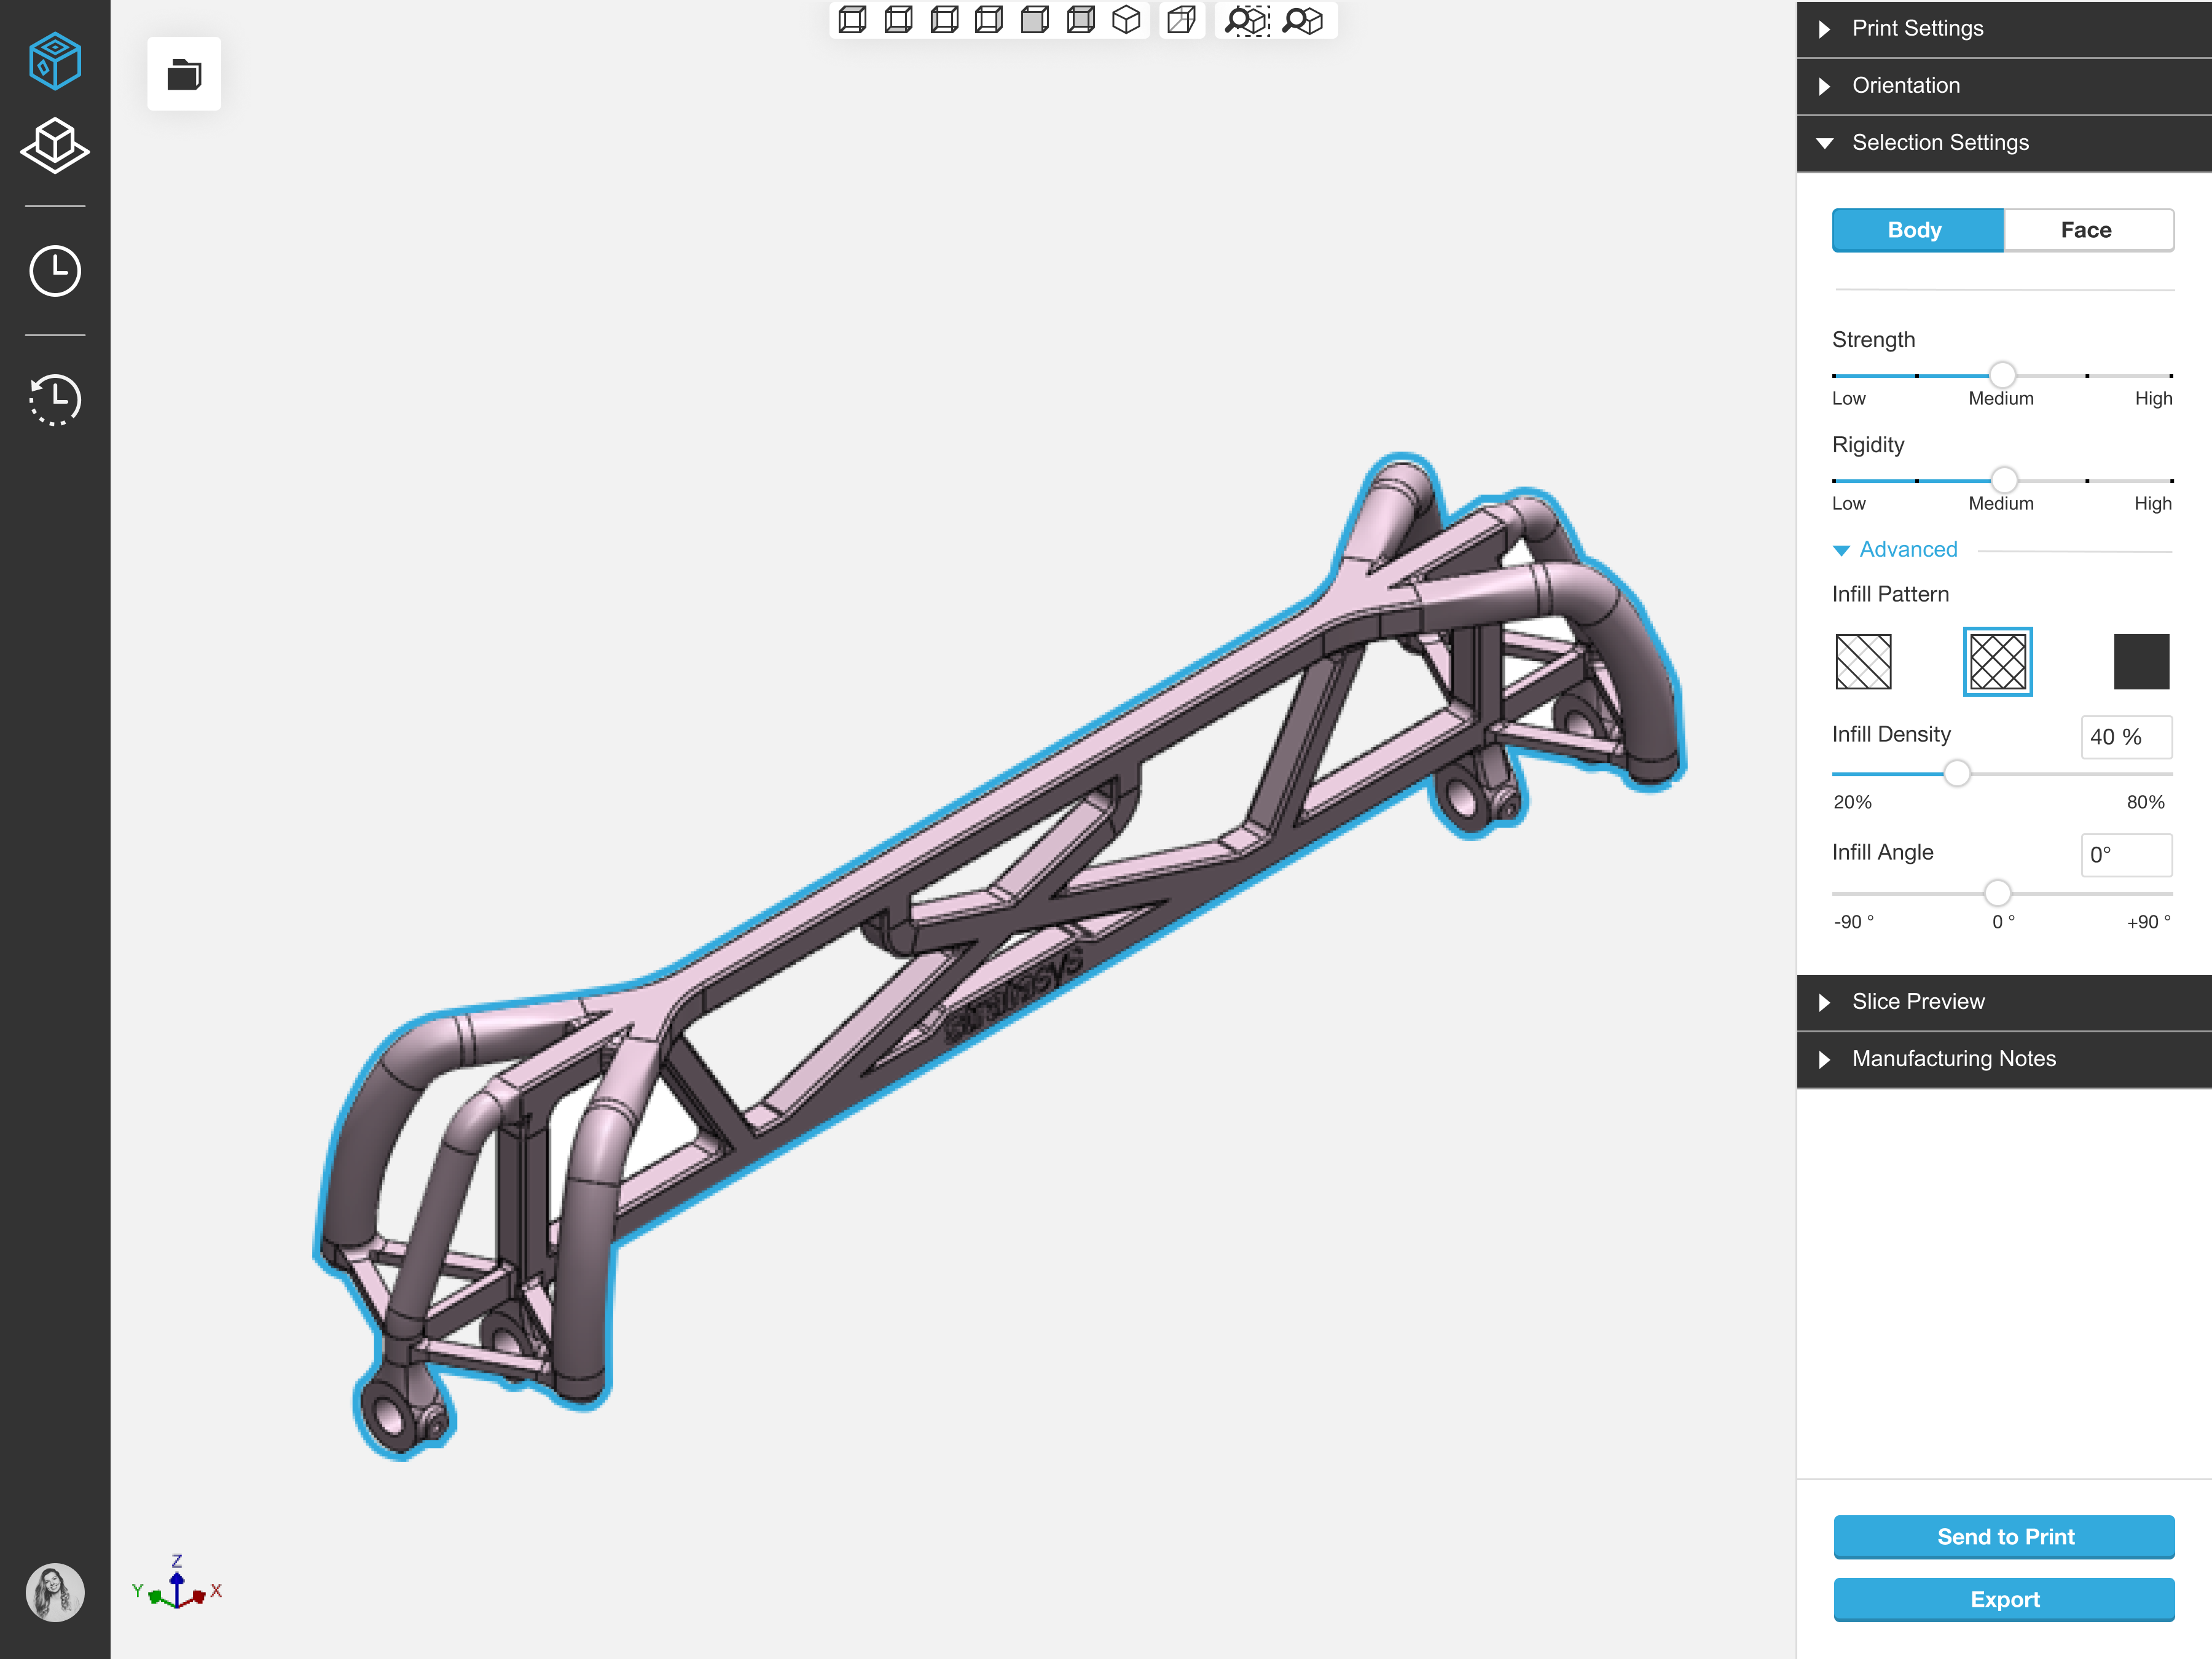
And then, I came up with the selection mode idea. If the user selects "Body", he/she will only be able to select bodies of the part, and the settings in the panel will only be the body settings. And same goes for the "Face" mode.
The Final Designs
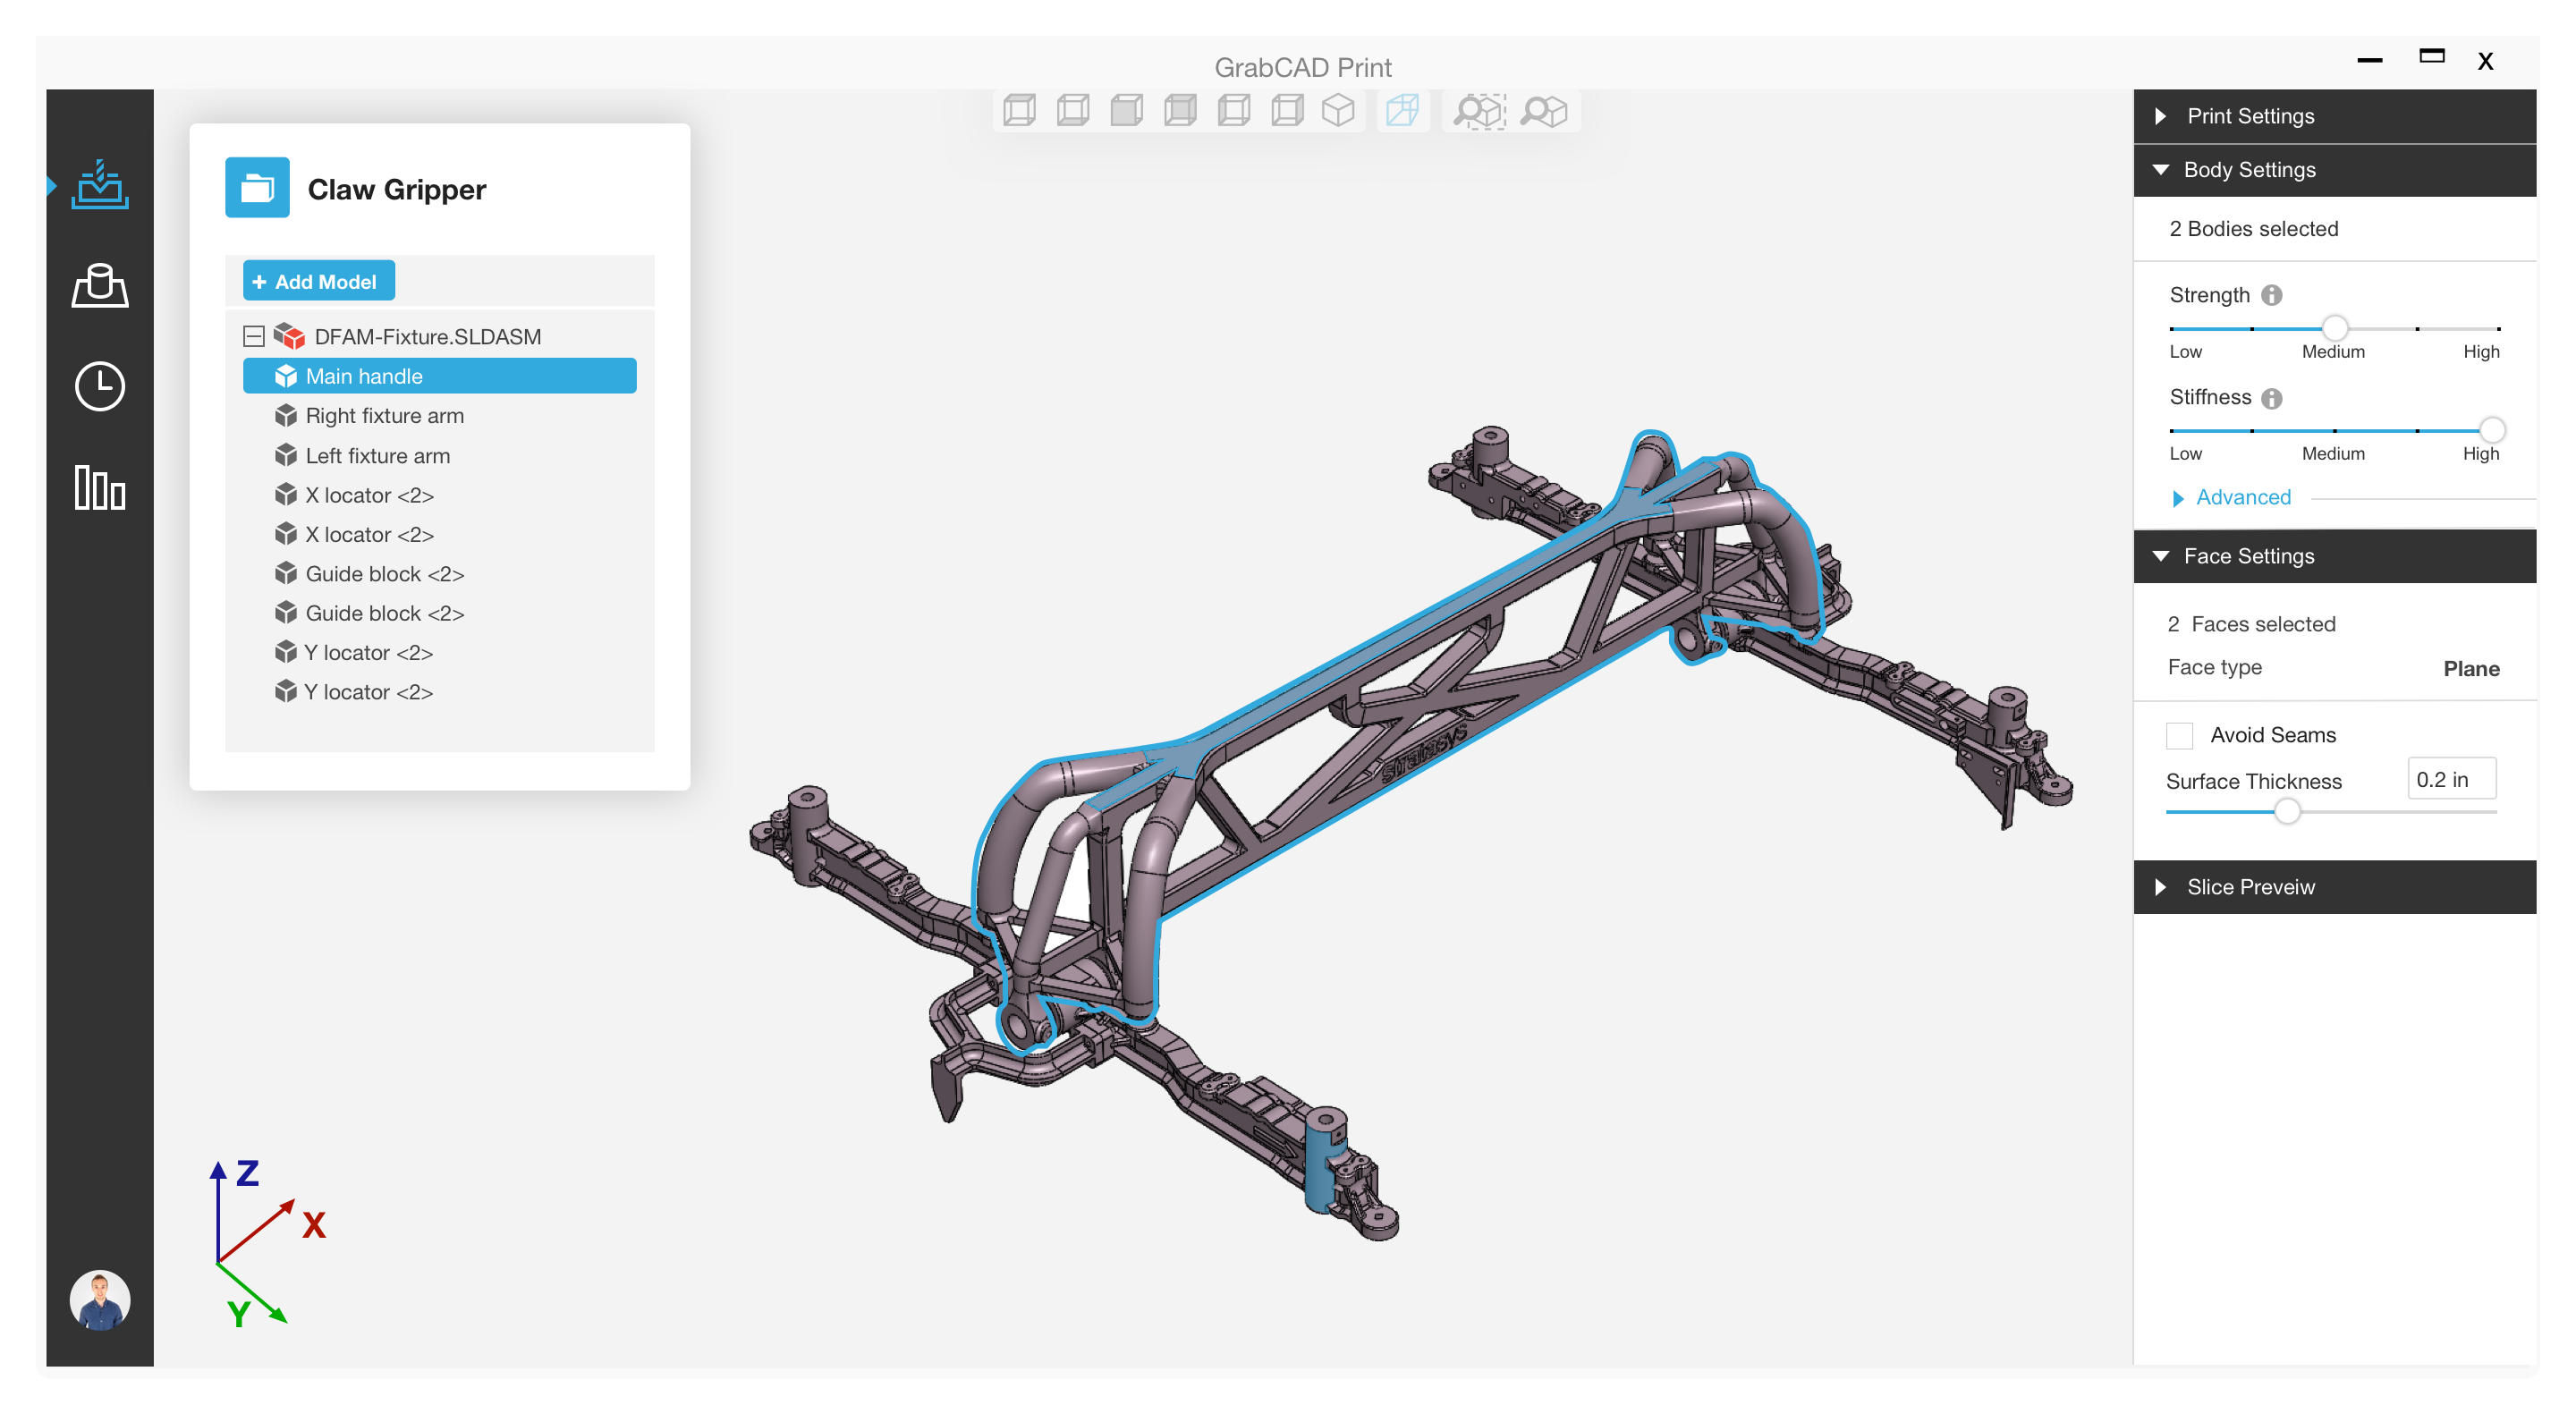
Body settings are divided into basic settings, such as controls for Strength and Rigidity and Advanced settings. Advanced Settings are hidden under the "Advanced" accordion and have features for more experienced users.
The intent was to support the workflows of users of different level of experience and proficiency.
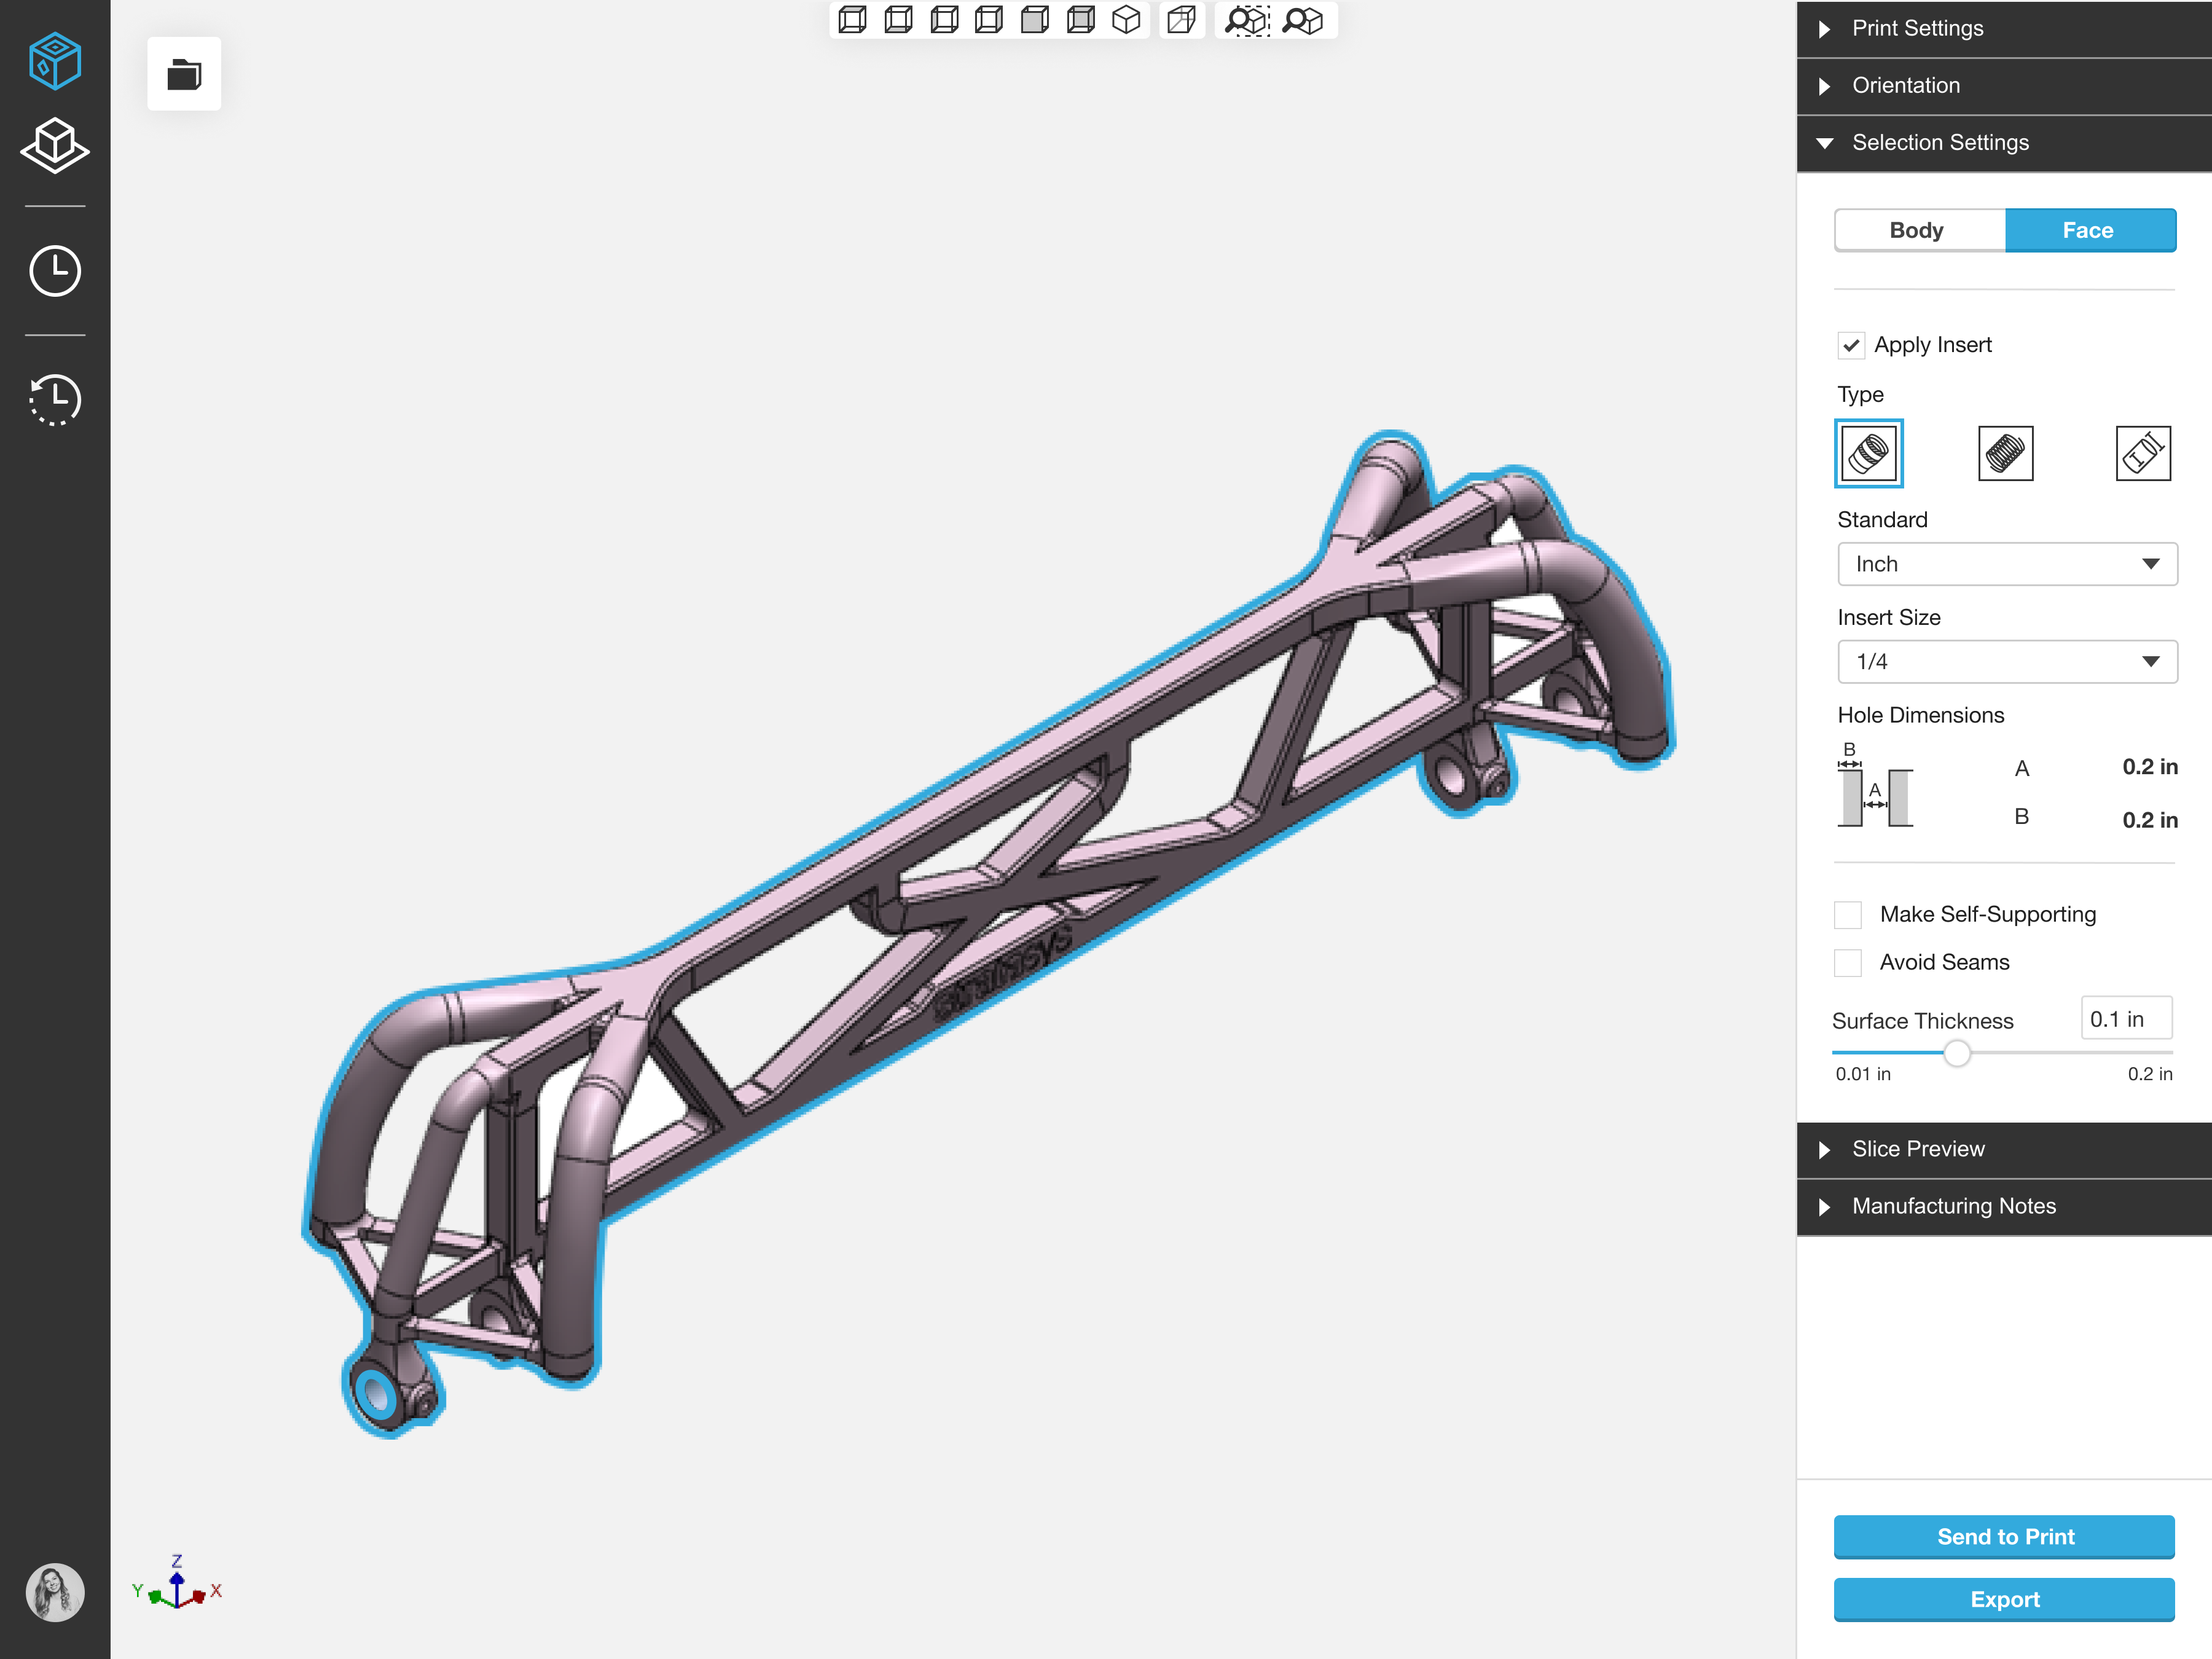
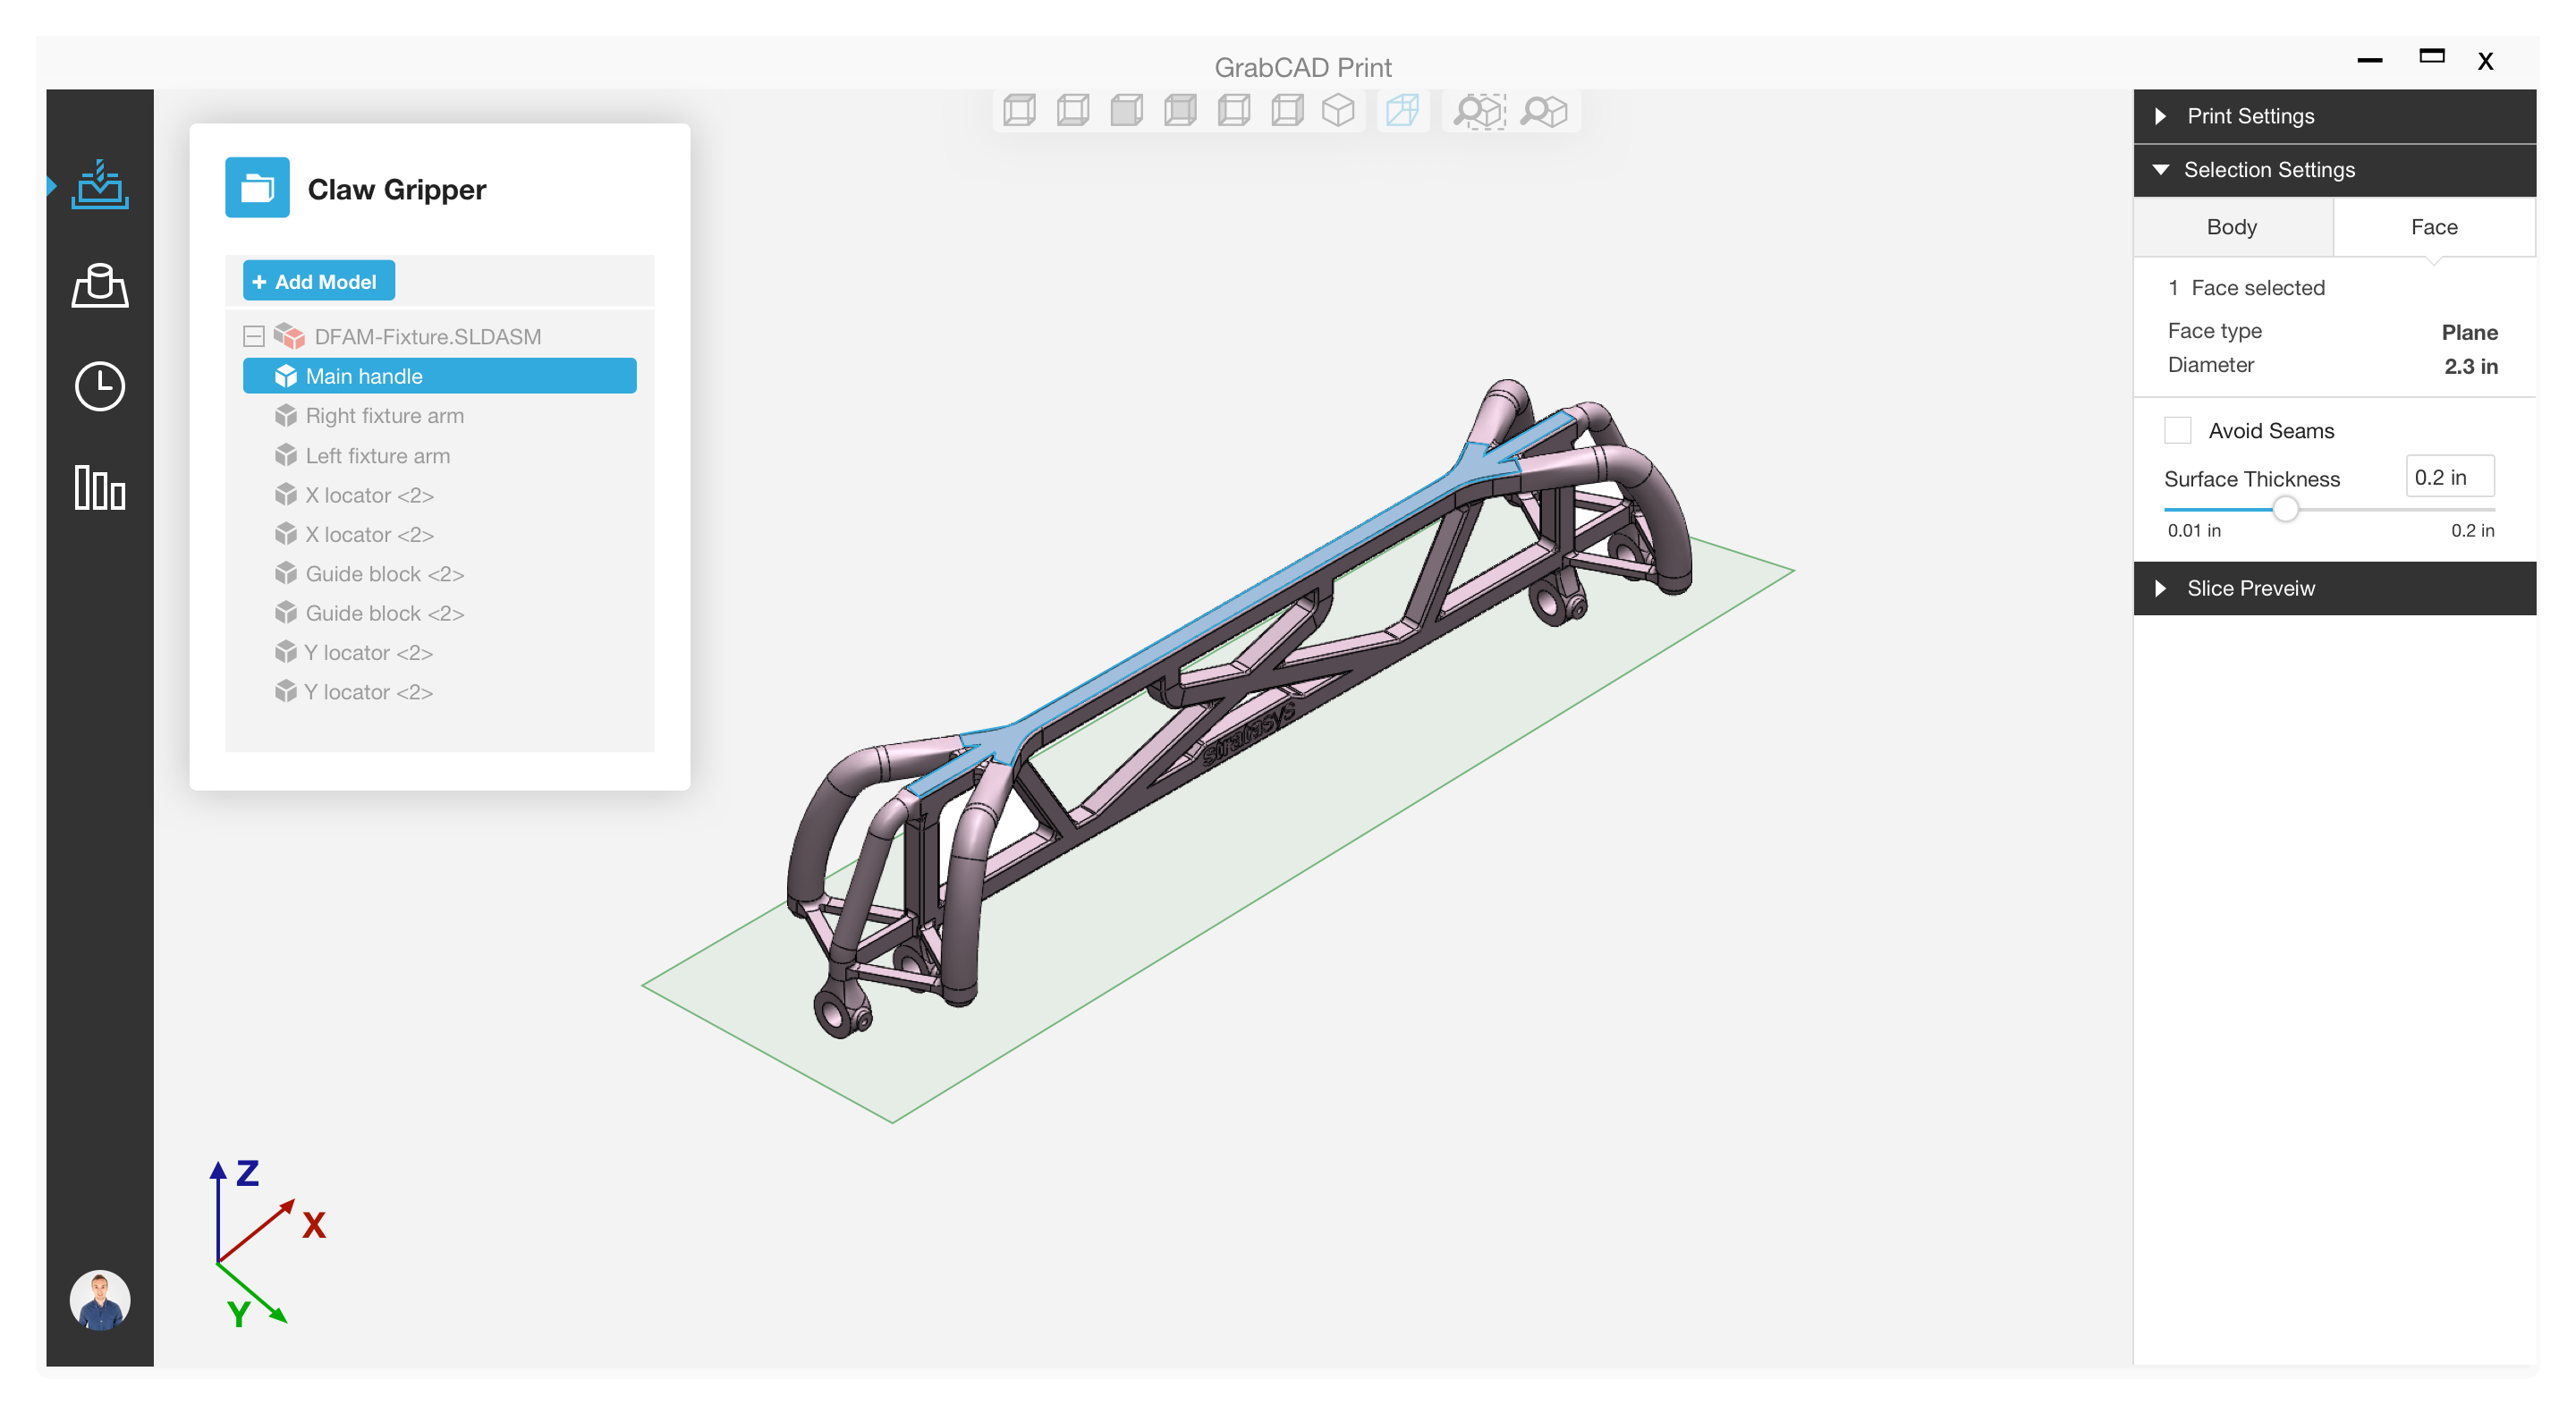
Face properties appear only when a face of a 3D model is selected. It includes different features that determine how strong and accurate the face will be.
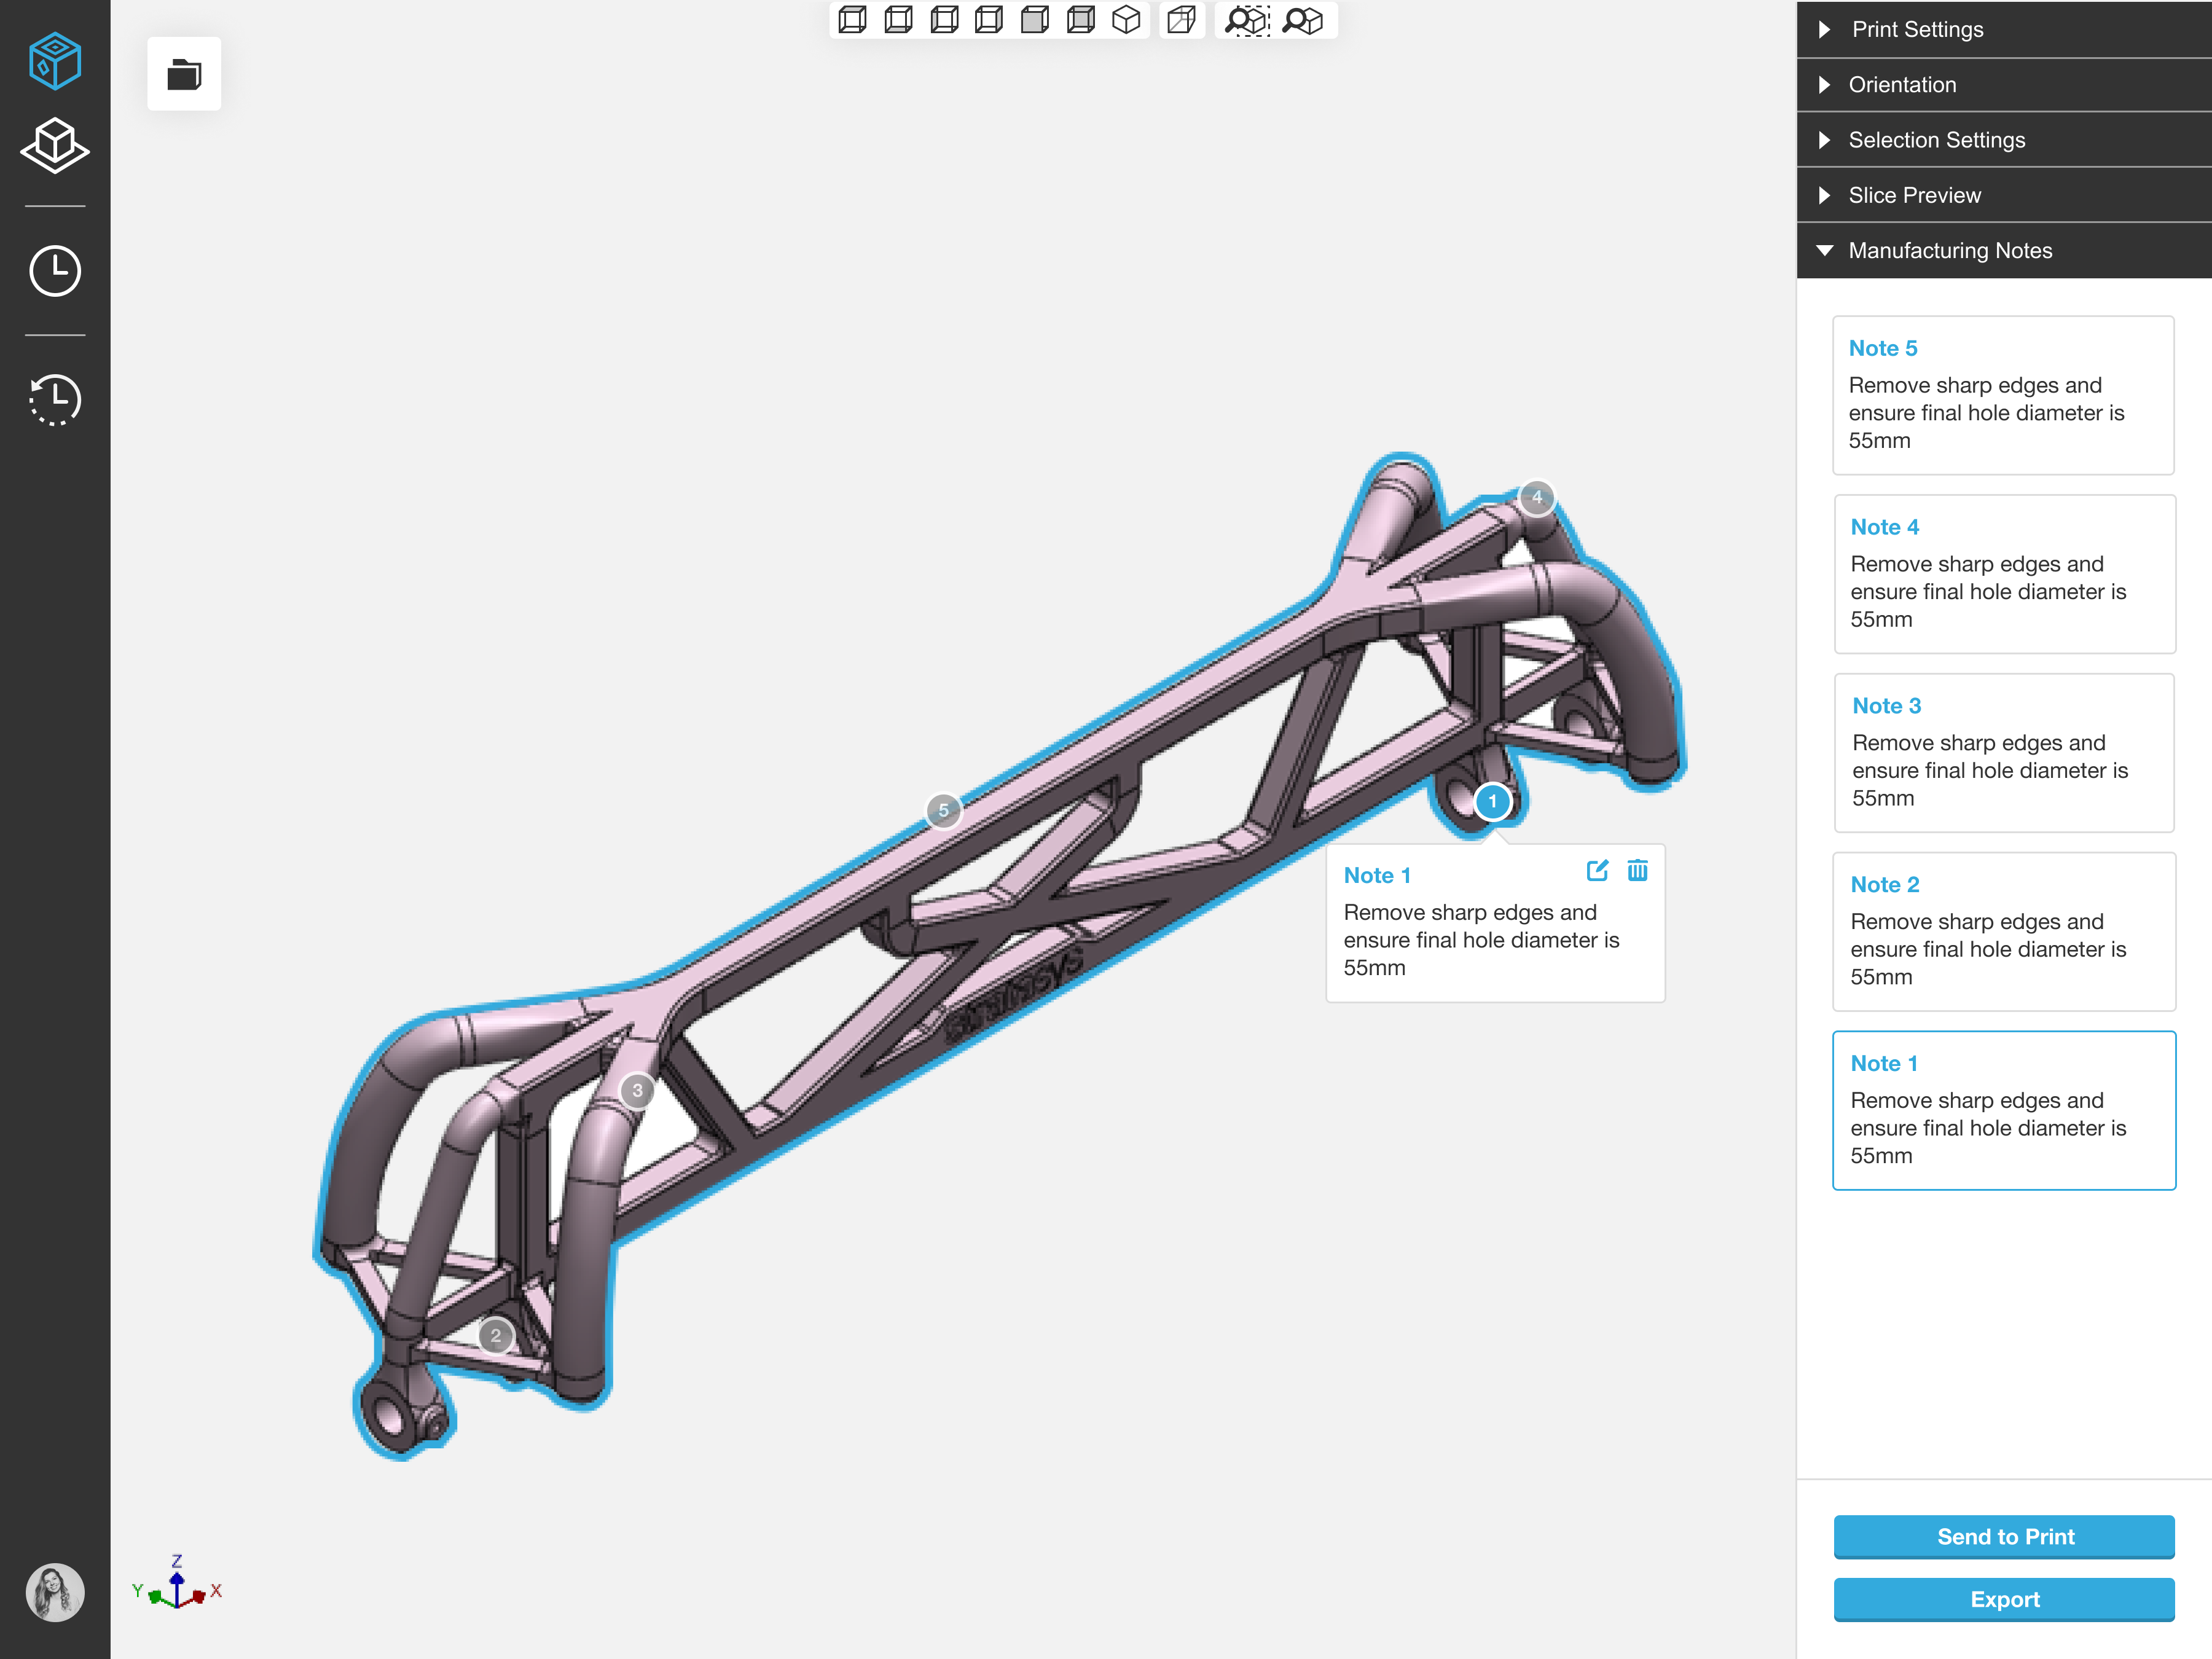
Add a note to any face or body to communicate any additional design intent, such as directions on how to paint or sand the part.
The Outcome
The feedback has been very very positive, here are a few quotes:
“GrabCAD Print Advanced FDM is a great addon to current software that opens brand new features and makes GrabCAd Print even more flexible when preparing models for print. The Advanced FDM feature set offers manufacturing engineers a streamlined design- to-part workflow and a user-friendly path between tooling CAD design and additive manufacturing.”
- Cezary Gaszewski, Manufacturing Engineer Baker Hughes
“The Advanced FDM addon for GrabCAD Print has been invaluable in improving our part processing time [...] Advanced FDM has negated the need to use multiple programs to program these parts, creating a more streamlined process. Furthermore, it has enabled us to better control the structure of end use car parts, something which was previously very difficult with the solutions we had to hand – allowing us to get better parts to the track faster.”
- Dave Hewitson, Rapid Prototyping Programmer, McLaren Racing